Set up the IFC Viewer in Microsoft Teams
Follow these steps to set up the IFC Viewer in your Microsoft Teams environment.
Note
- Privacy first: IFC and BCF files are processed client-side. Files are not uploaded to Flinker. For more details, see Microsoft App Compliance.
Setup steps
Step 1: Get the IFC Viewer app
Option 1: Open the Teams app store listing.
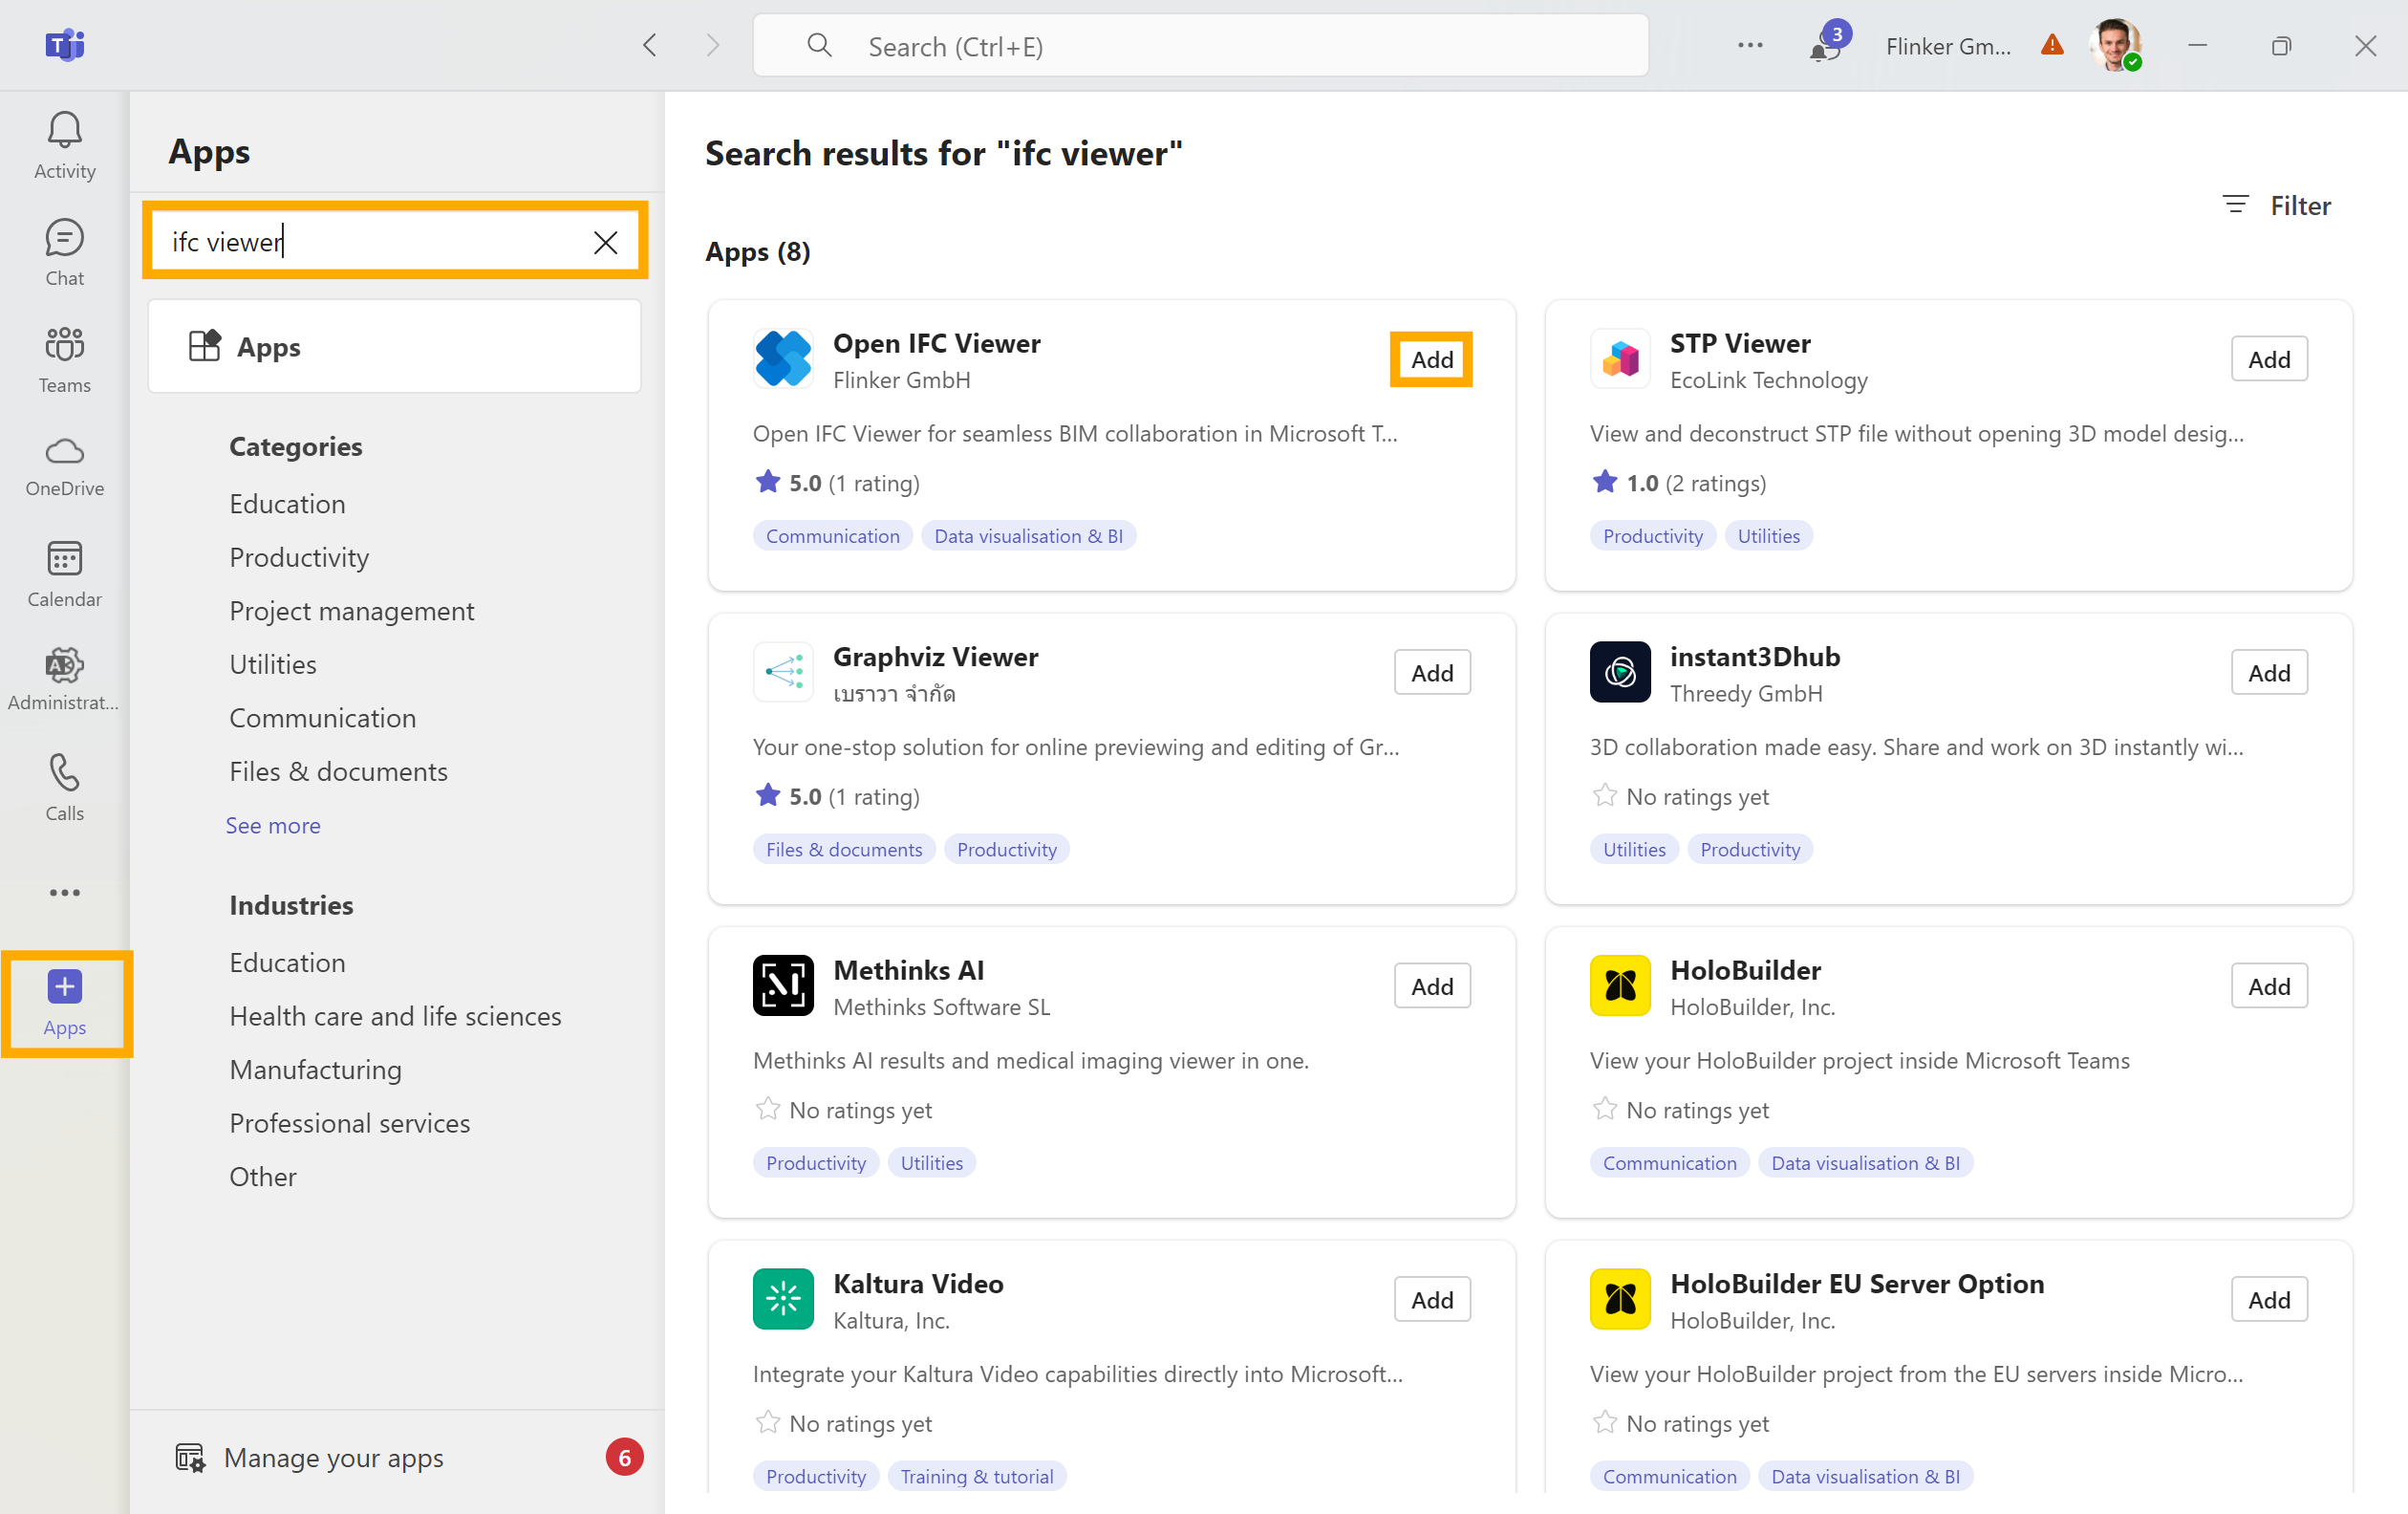
Option 2: Open Microsoft Teams, go to Apps, search for IFC Viewer, and select Add.
Step 2: Add IFC Viewer to your team
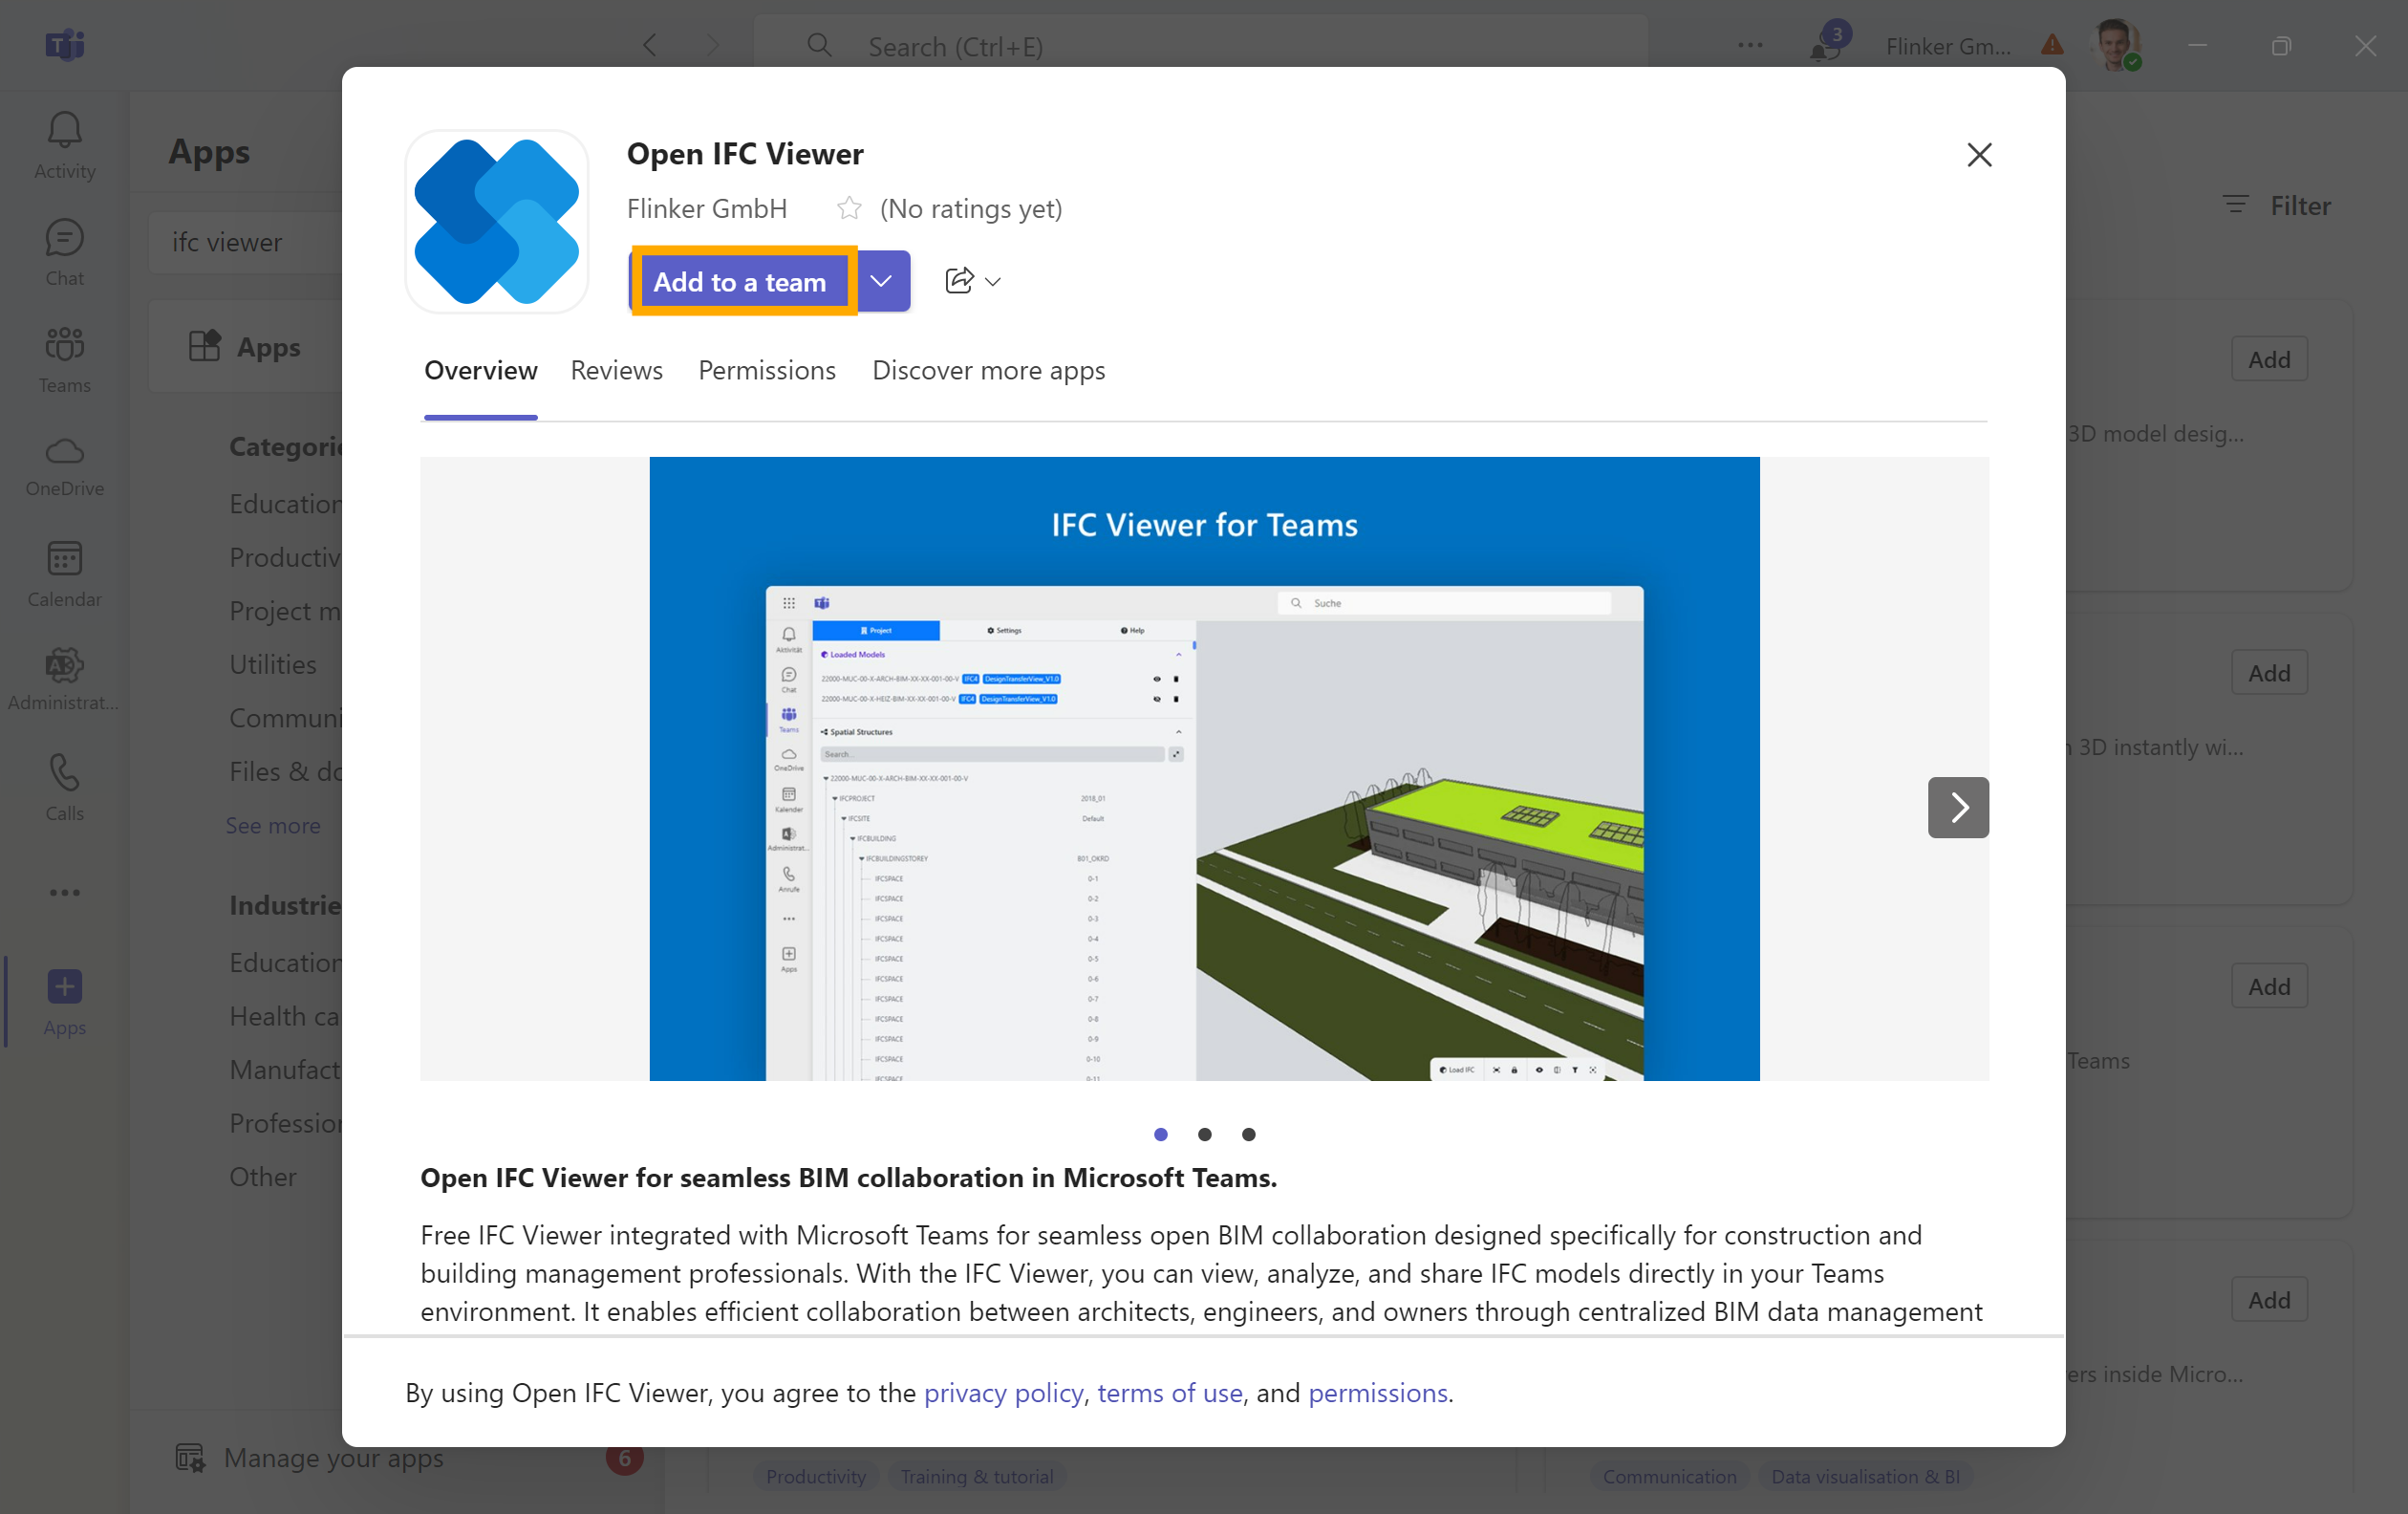
Select the team where you want to add the IFC Viewer, then select Set up a tab or Add to a team.
Step 3: Set up the tab
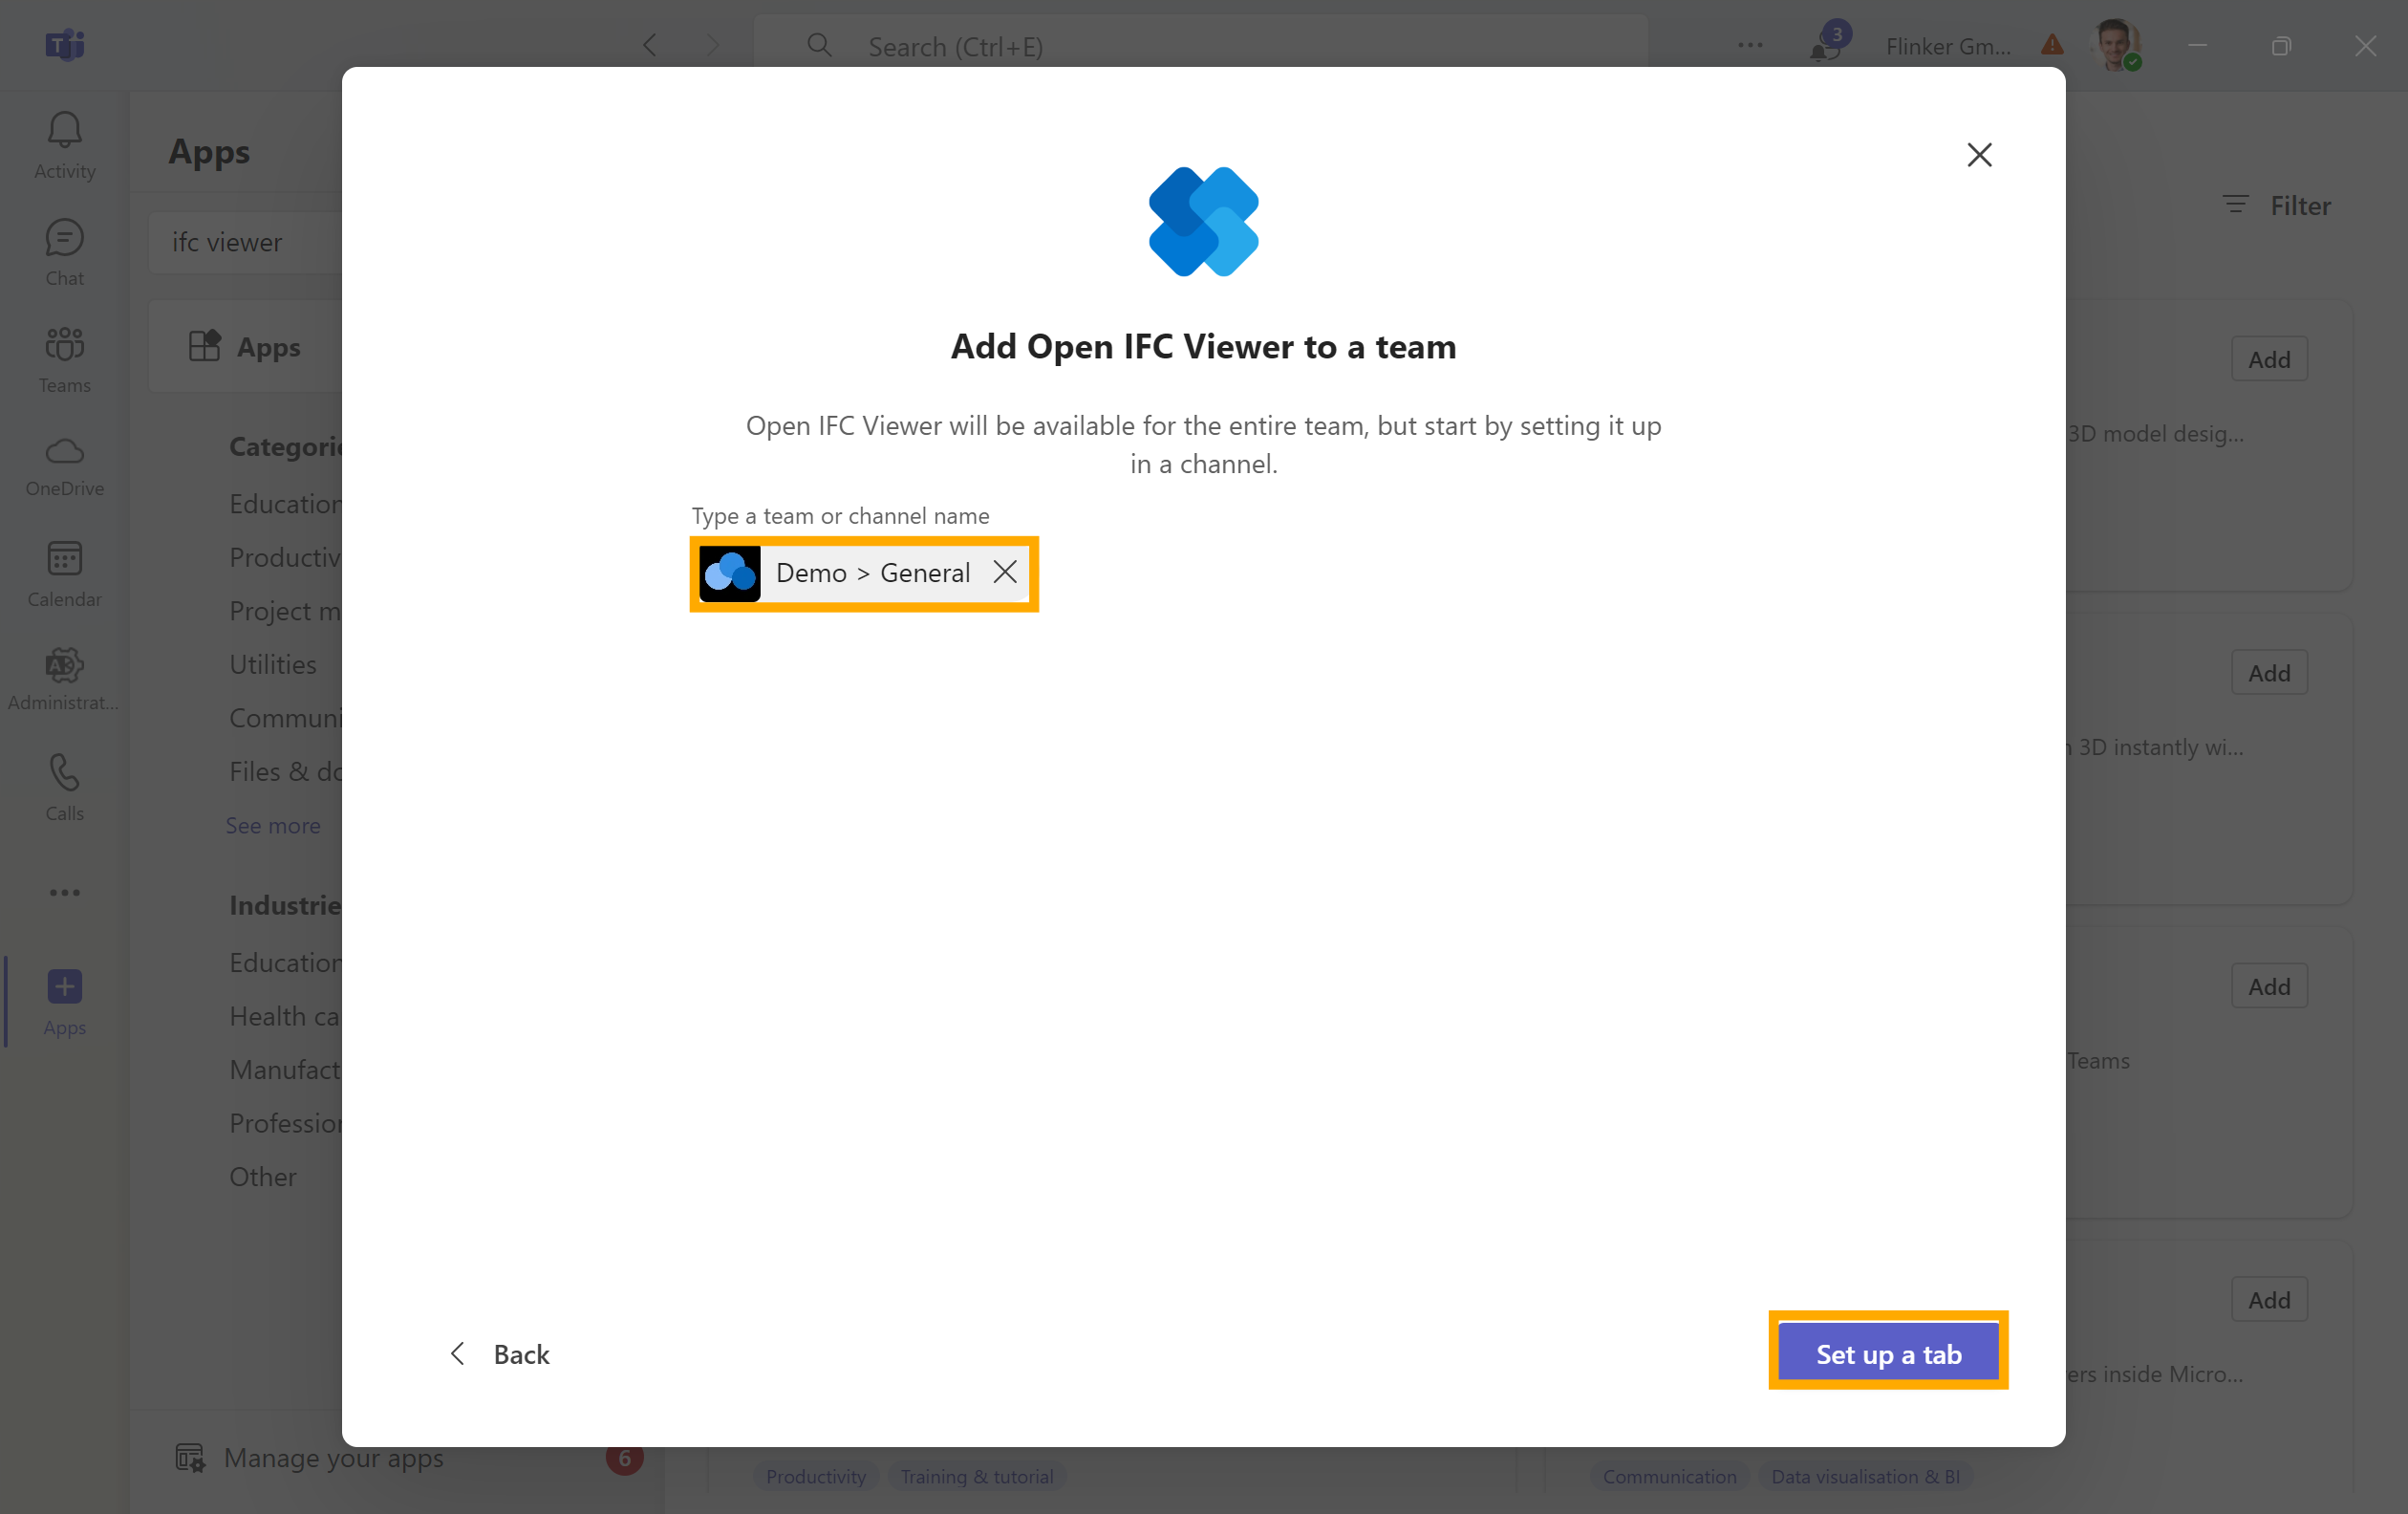
Choose the team and channel where you want to set up the IFC Viewer tab, then select Set up. You can also add the tab to multiple teams and chats.
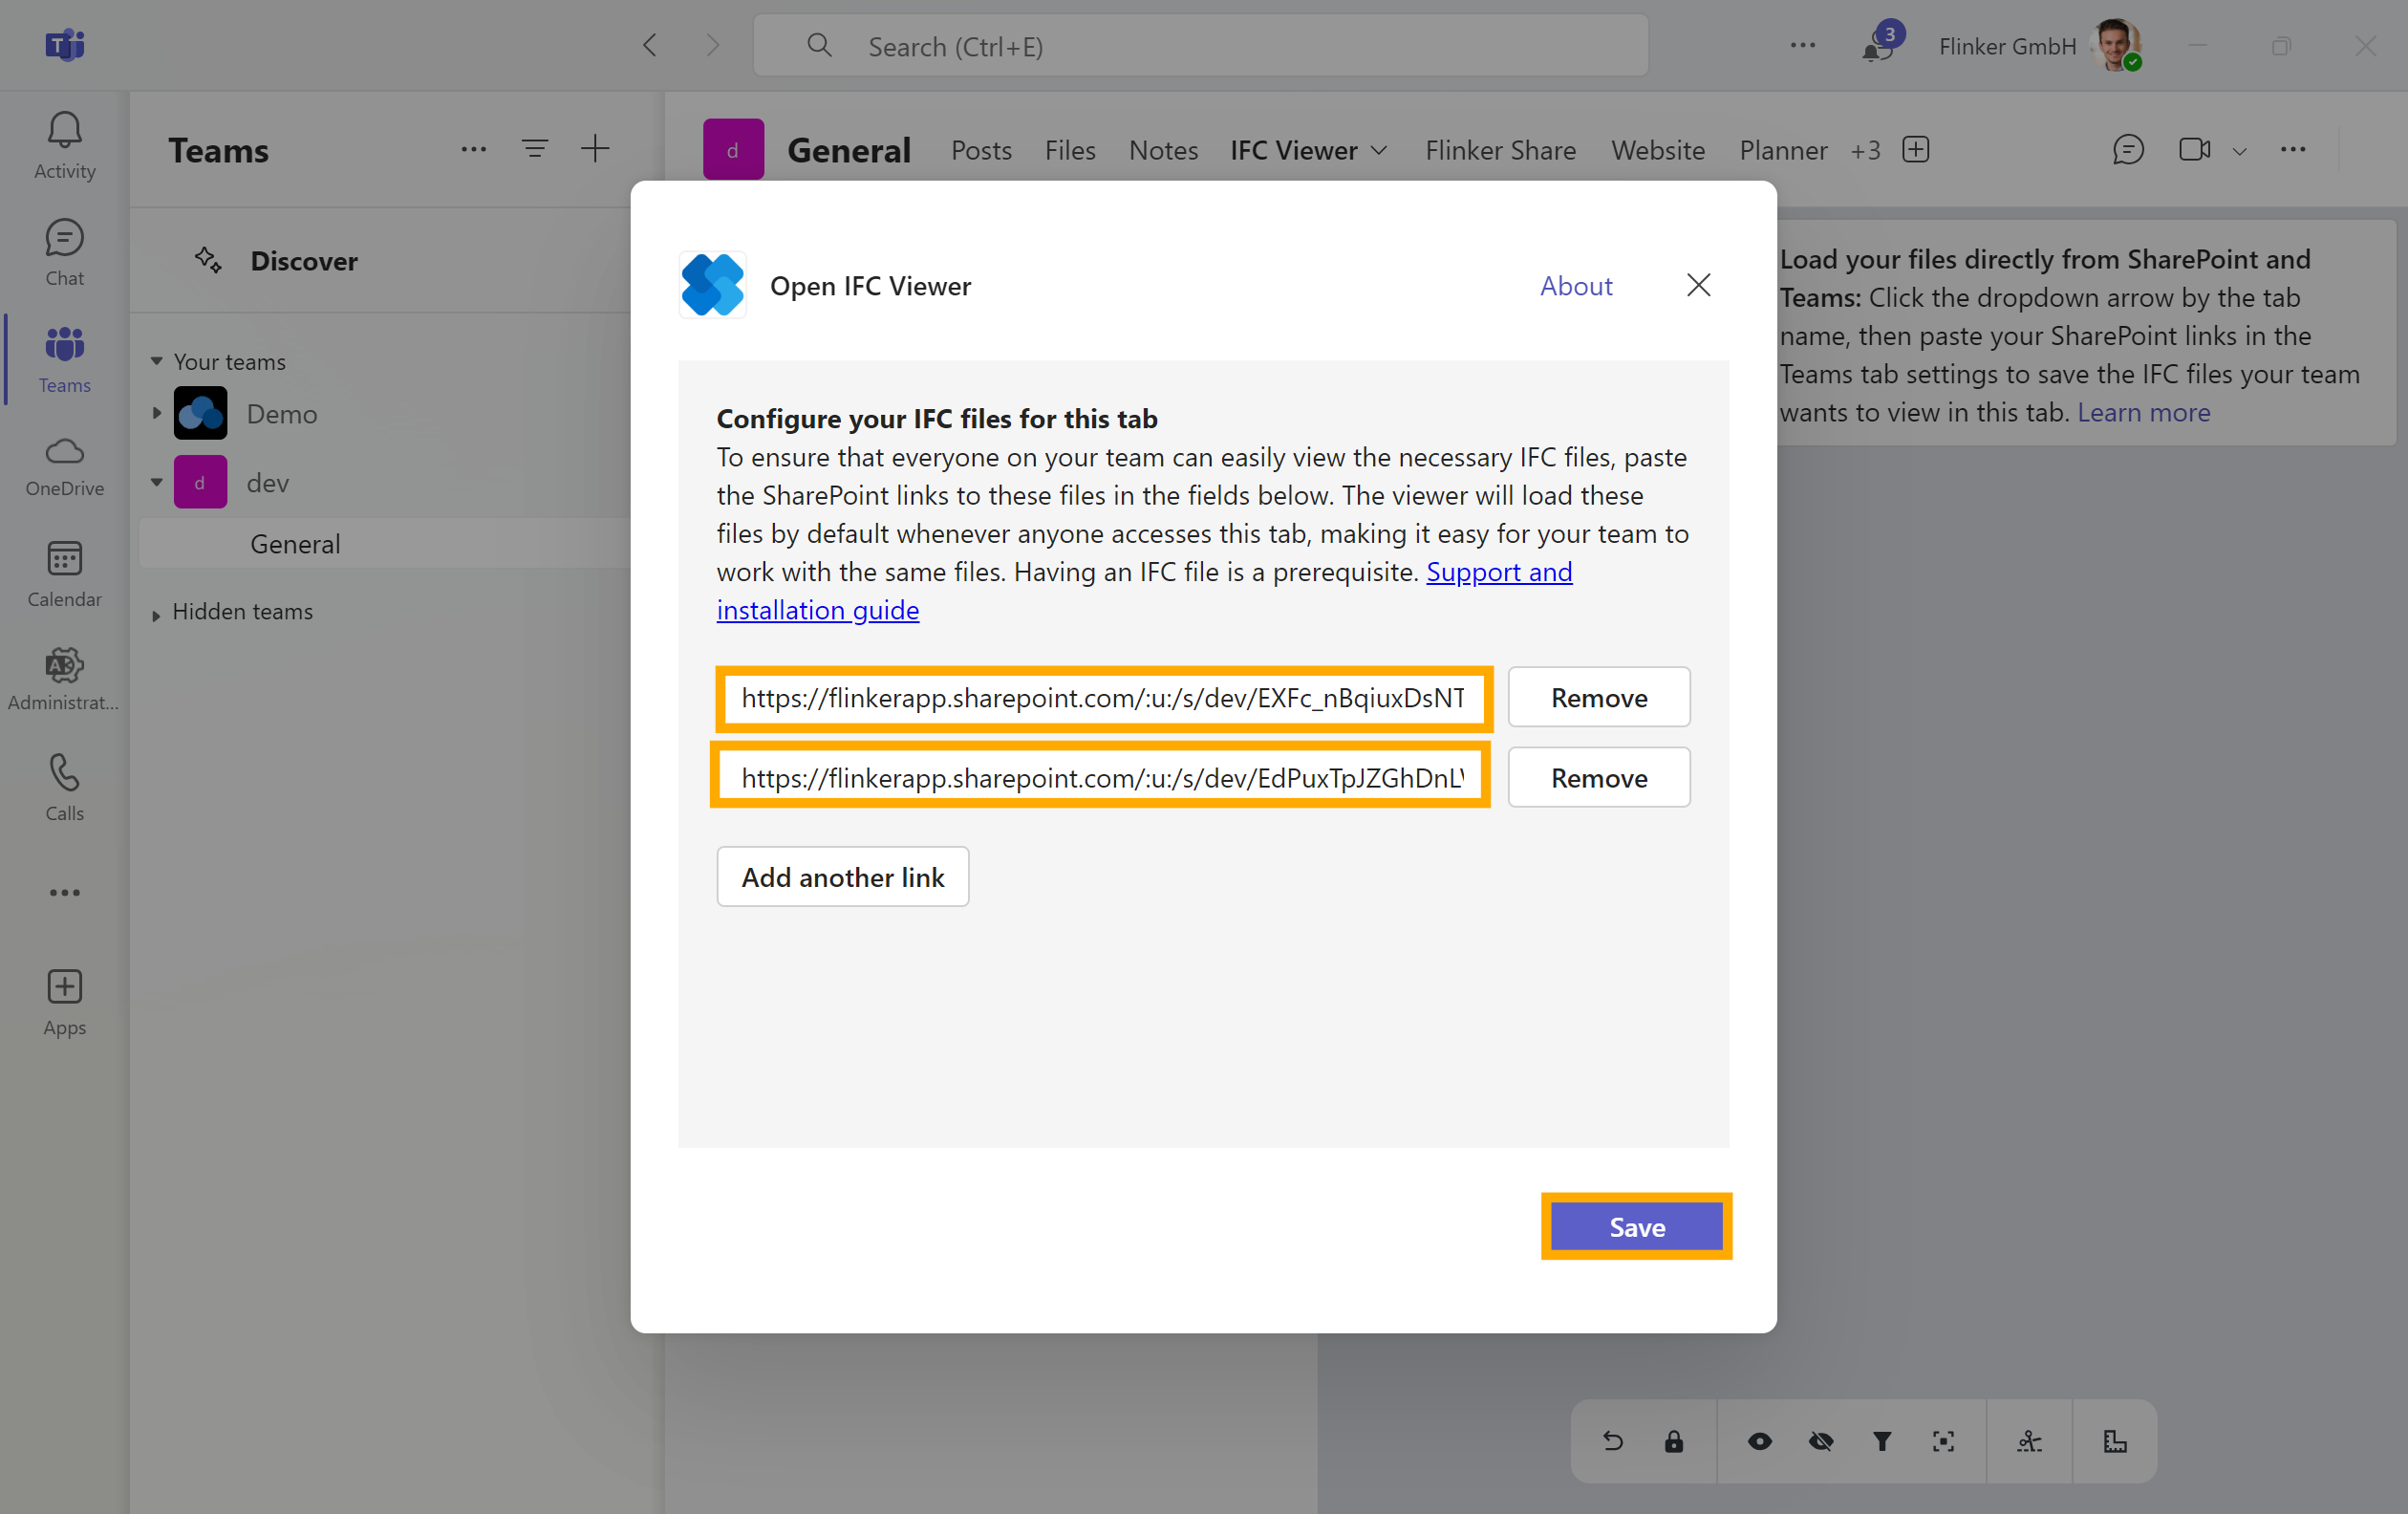
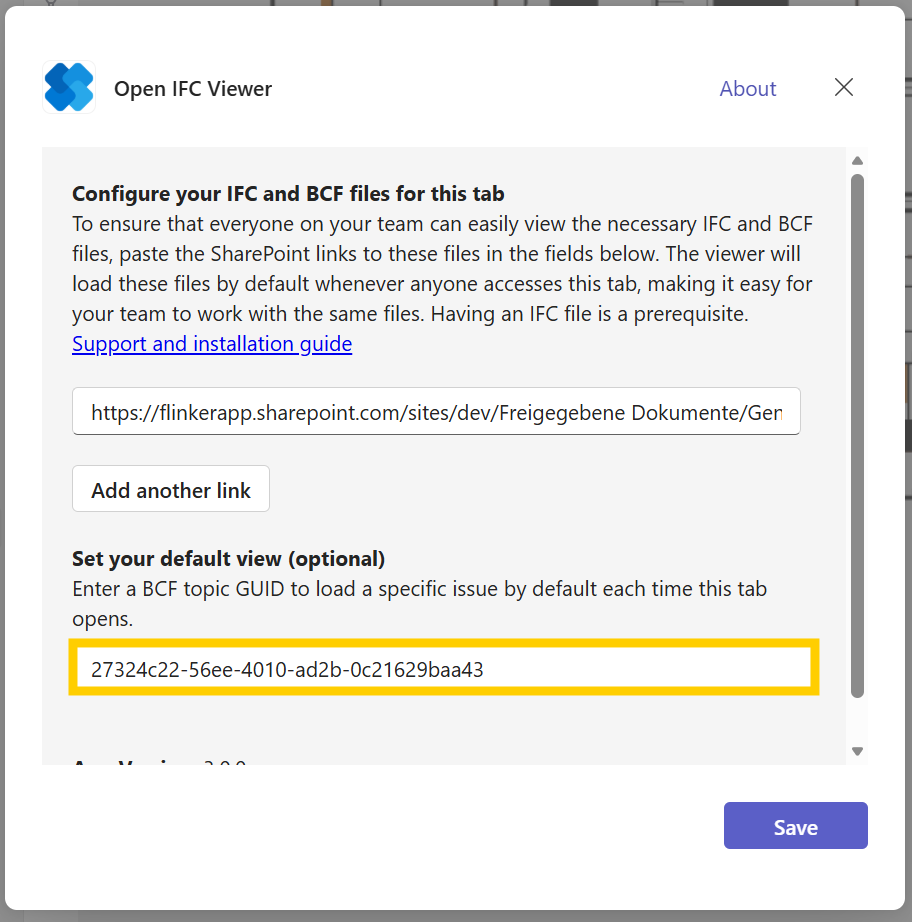
After the tab is created, the settings window opens. To load IFC or BCF files automatically, add SharePoint or Teams file links. You can also return to this window later.
To open a specific BCF issue by default, paste its topic GUID into Set your default view (optional). Select Save to add the tab.
Step 4: Connect to your files
Select Connect to grant permissions for the IFC Viewer to access files in SharePoint or Teams.
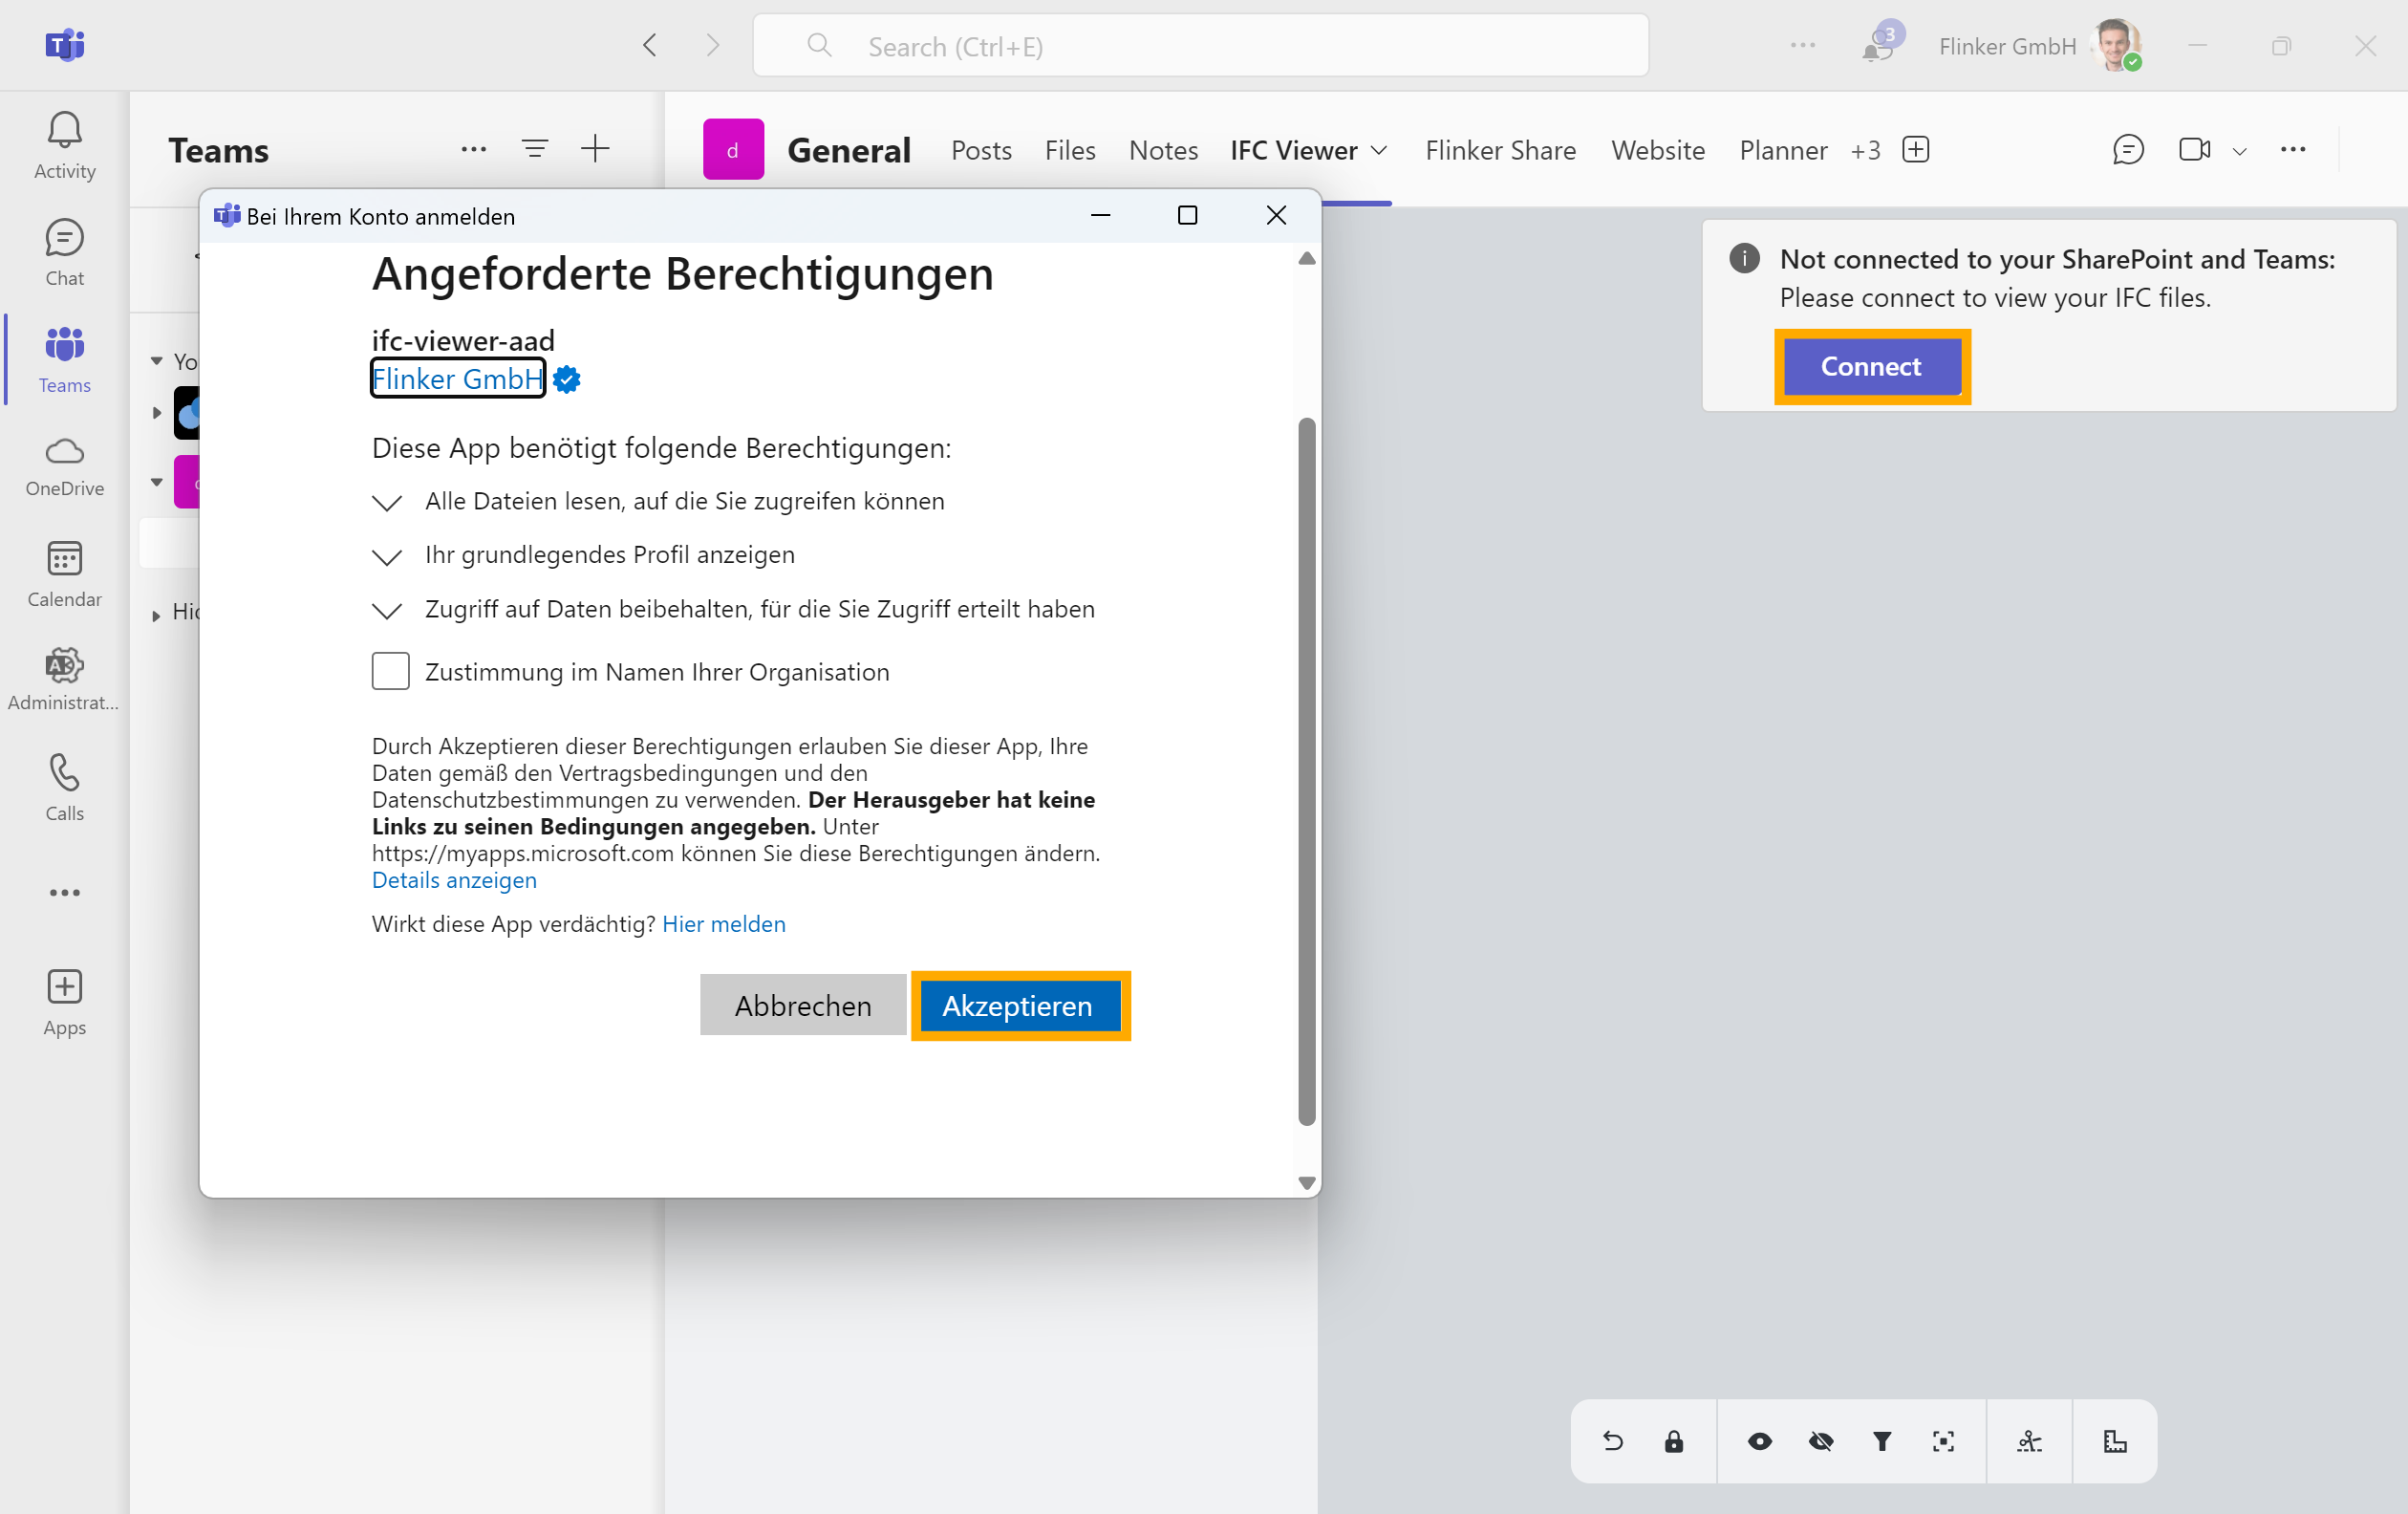
Admin approval
If your organization requires admin approval, click here to grant permissions
When you connect, the IFC Viewer will request these scopes:
Files.Read.All
Read files on behalf of the signed-in user.
Type: Delegated permissionUser.Read
Sign you in and allow the app to read your basic profile.
Type: Delegated permission
Note
Why file read permissions are required
The IFC Viewer requires permission to read IFC files stored in SharePoint and Teams. This lets the app retrieve and display files directly from Microsoft 365 without manual downloads or transfers.
Your files are not transferred externally. The app operates within the SharePoint and Teams environment, ensuring that all data remains securely within your organization's ecosystem.
If you see "This app requires your admin’s approval," your organization's security settings require admin approval before the app can access files. Contact your IT administrator.
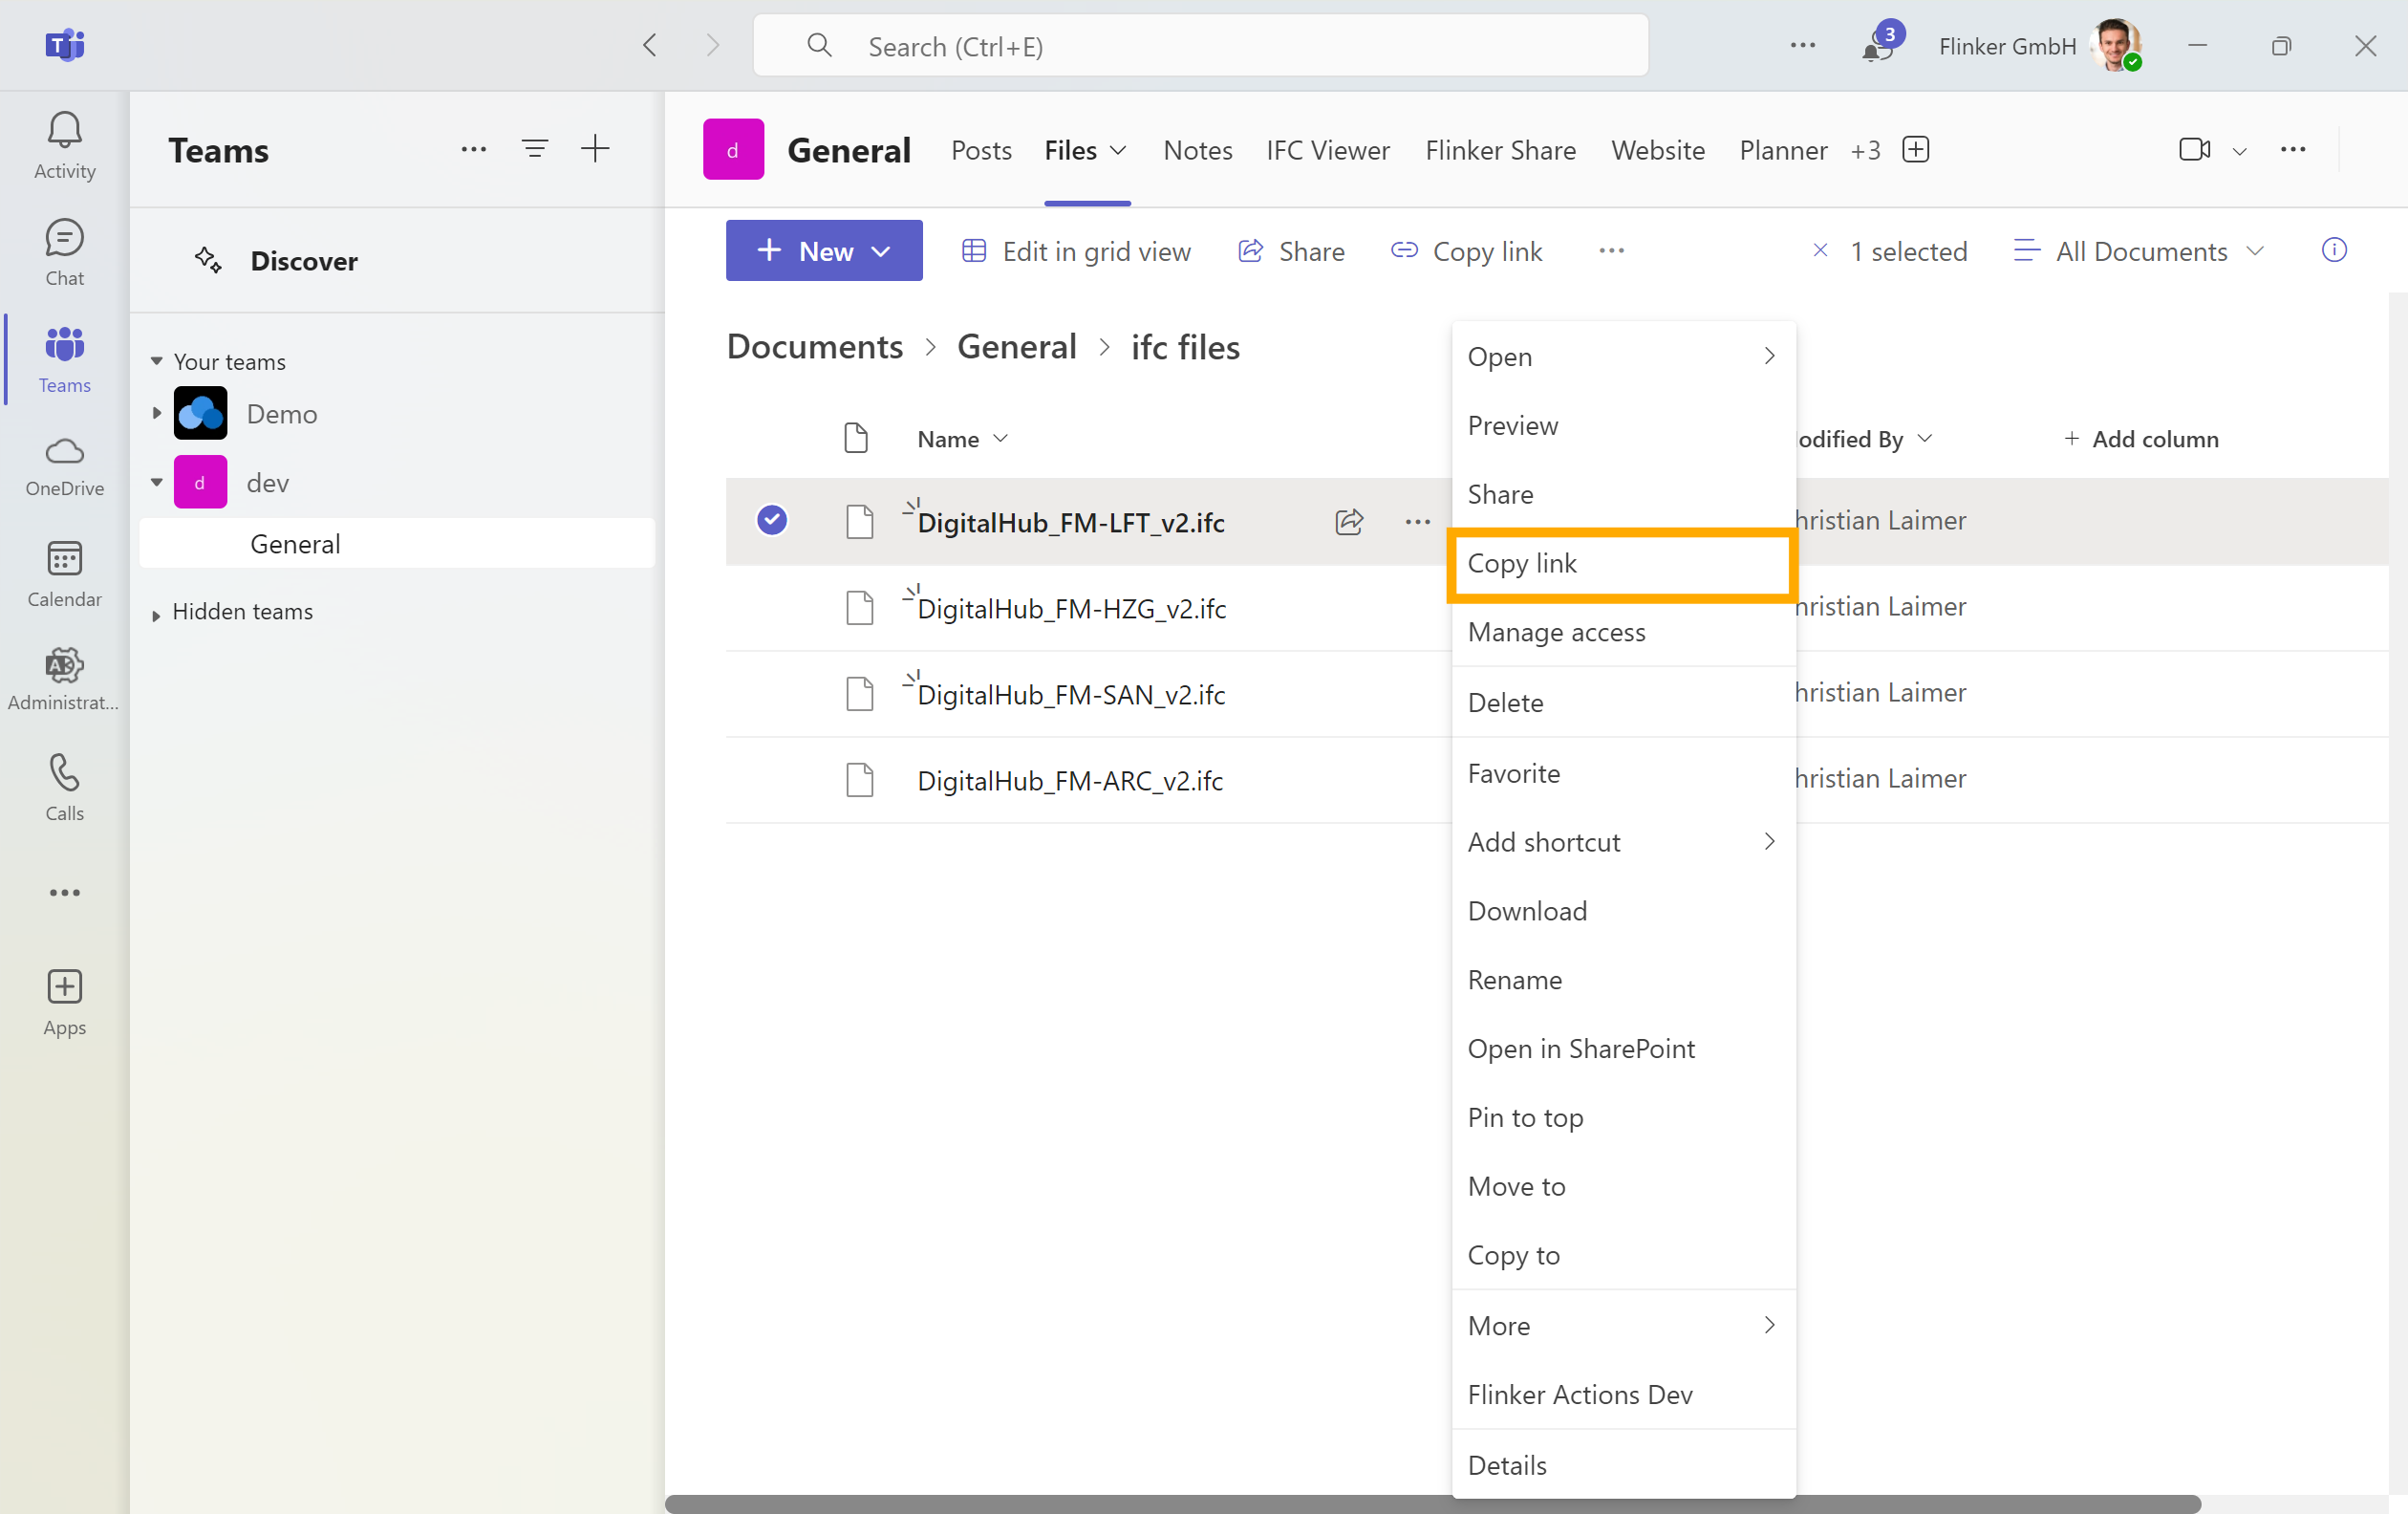
Step 5: Copy links for IFC or BCF files and folders
Go to the Files tab and copy the links for the files you want to view in the IFC Viewer. Supported links are:
- Individual IFC or BCF file links,
- A folder link that contains multiple IFC/BCF files you want to display together
- If the file is in OneDrive or SharePoint, copy the OneDrive or SharePoint link.
- If the file is on an external drive, upload it to SharePoint or Teams first.
Note
When you open the IFC Viewer tab, you will only be able to load and view files if you have permission to open the file links that were pasted into the settings. If you do not have access to a specific file or folder, it will not appear in the viewer. Make sure you have the necessary permissions in SharePoint or Teams to view the linked files.
Step 6: Configure tab settings
Return to the tab settings.
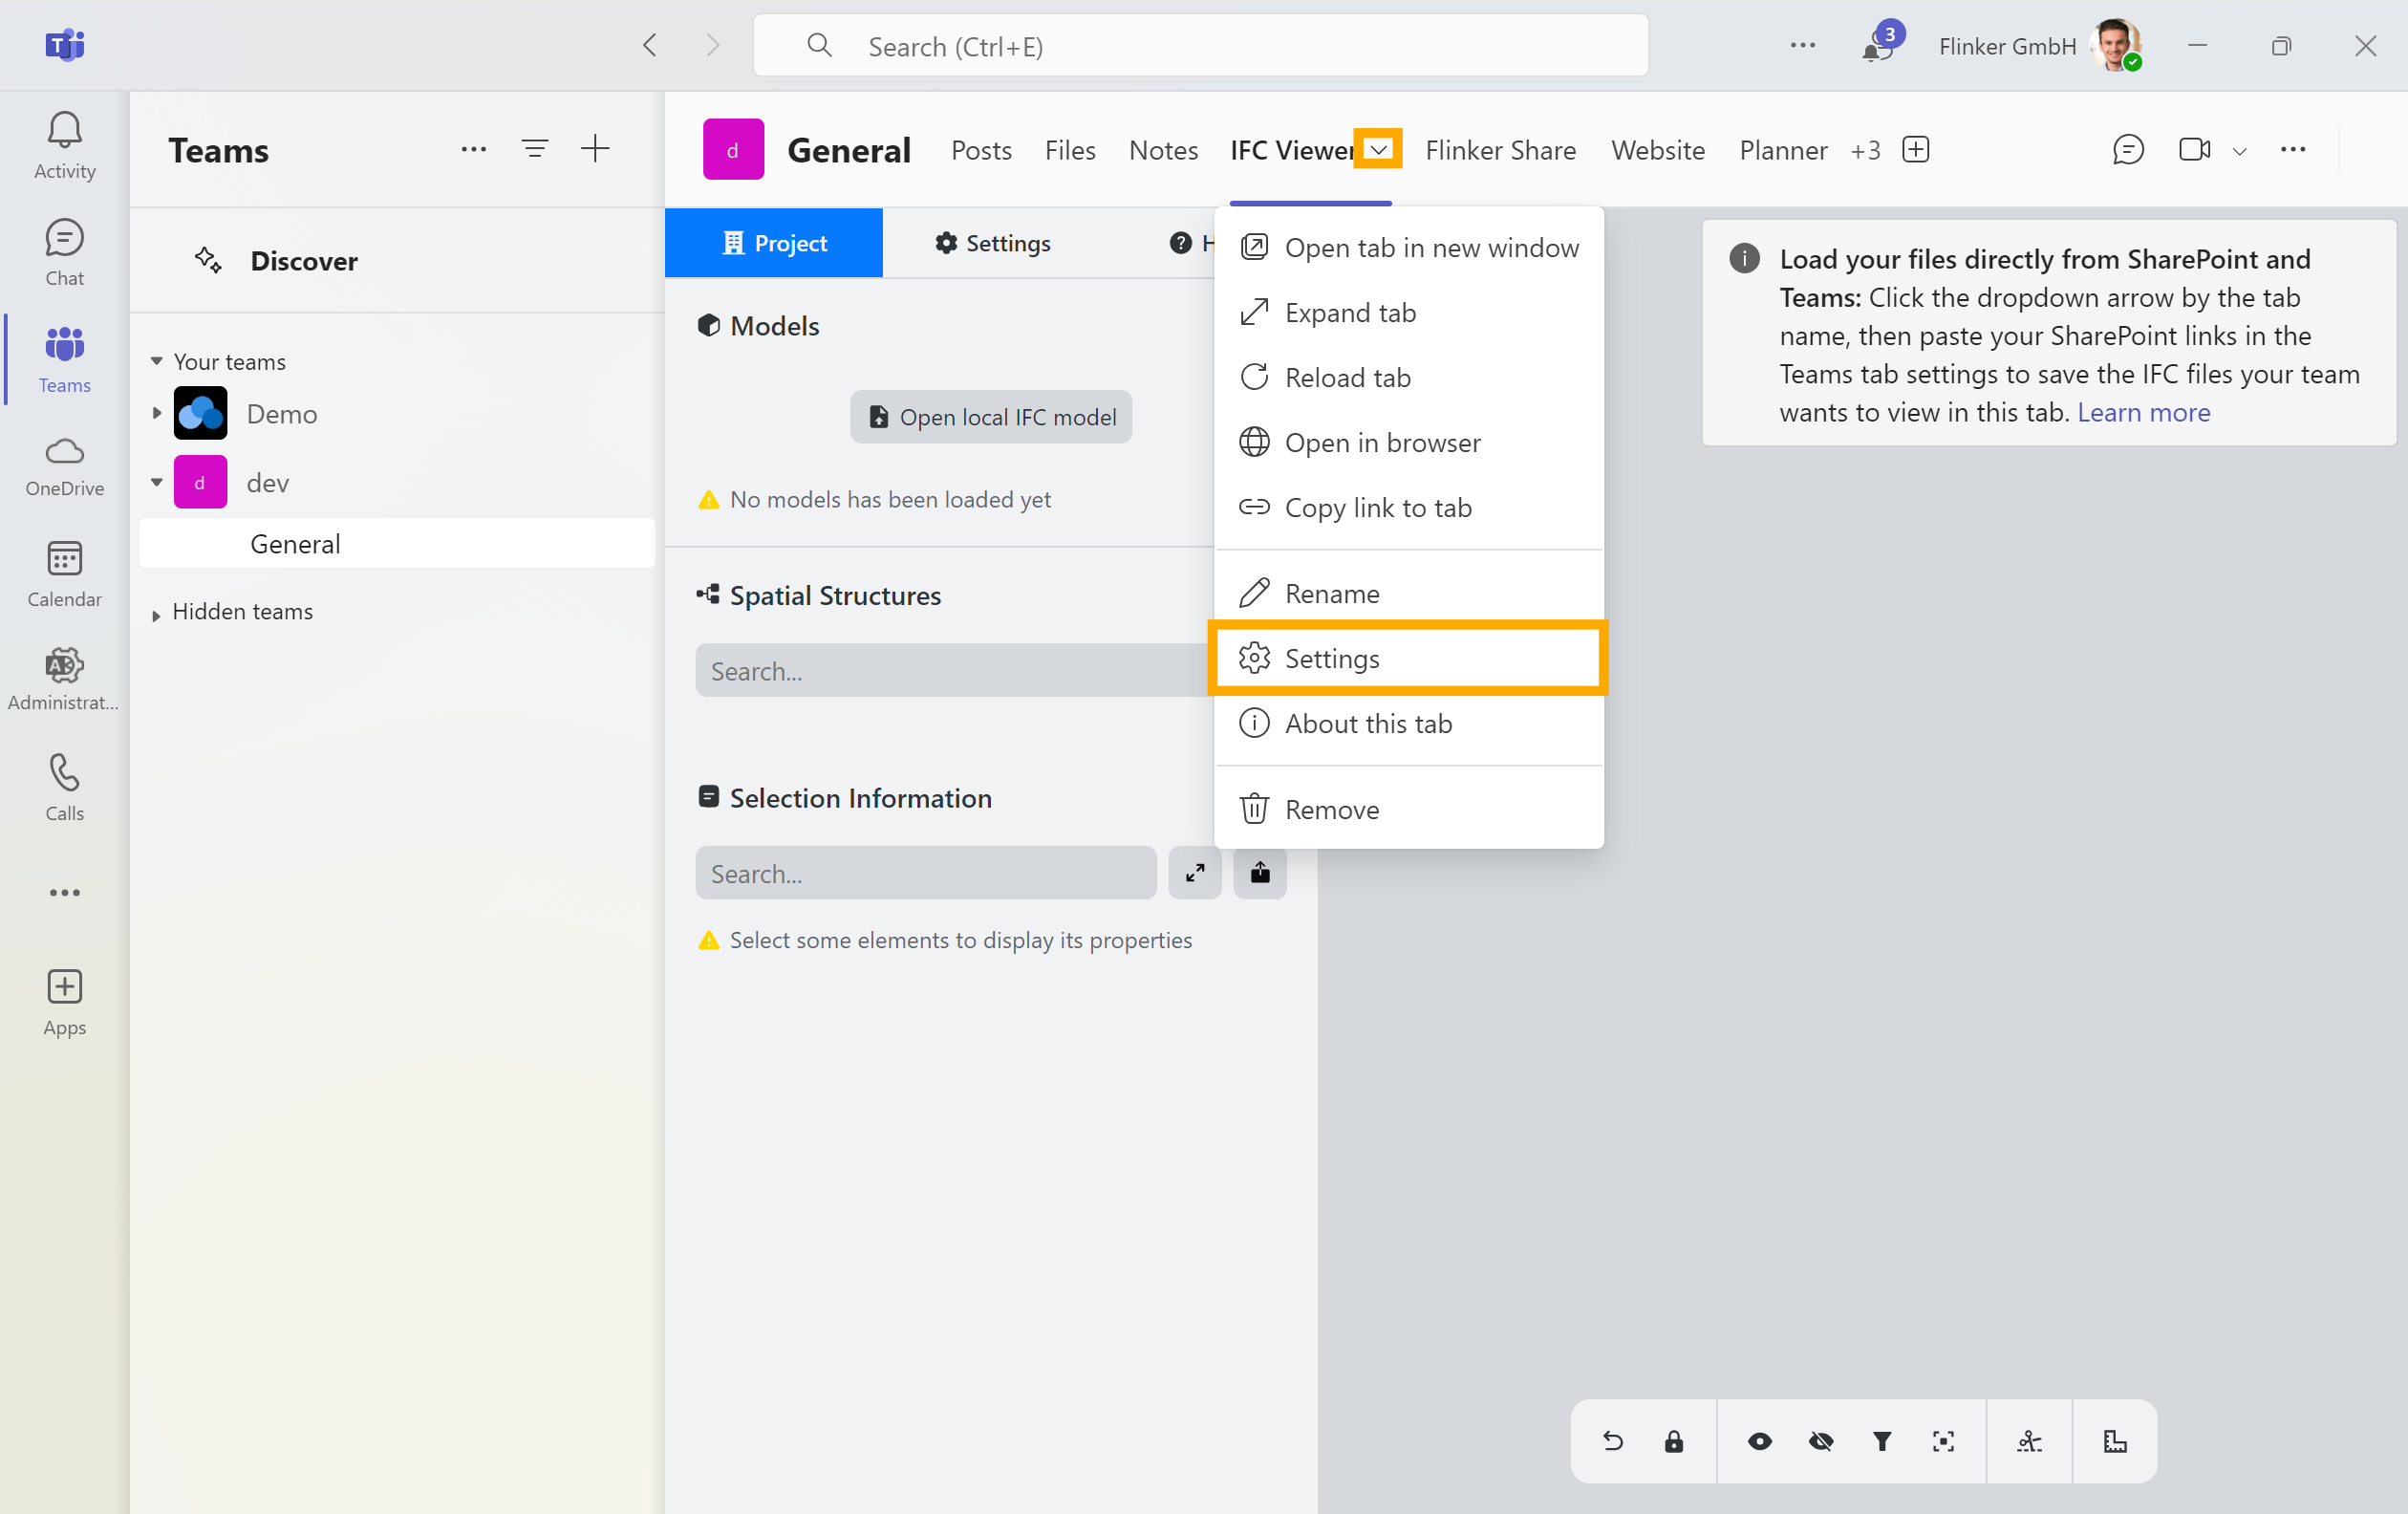
Paste the copied file links, and save the settings. Pasting file links from SharePoint or Teams ensures that these files will load automatically whenever the tab is opened.
If you also want the tab to always open on one specific BCF topic, use the optional default view field shown below.
Done: IFC files load automatically
IFC and BCF files will load automatically according to the settings whenever you open the tab. If you add multiple IFC file links, or a folder link containing IFC and BCF files, the viewer loads them together in the same tab. You can restrict upload permissions by adjusting SharePoint settings or using ISO 19650.
The IFC Viewer tab is now configured in Microsoft Teams.
Organization-wide deployment for administrators
The steps above describe setup for individual users or team owners. If you are a Teams administrator deploying the IFC Viewer across your organization, use one of the following methods.
Option A - App setup policy
The IFC Viewer can be deployed and pinned tenant-wide or for specific security groups via Teams App Setup Policies in the Teams Admin Center.
Option B - Team templates
Team Templates let you include the IFC Viewer as a pre-configured channel tab in any new team created from the template.
- Go to Teams Admin Center, then Teams, then Team templates.
- Create a new template or edit an existing one.
- Add a tab to the desired channel and select the IFC Viewer app.
- Save the template.
New teams created from this template will include the IFC Viewer tab automatically. This option applies to new teams only; existing teams are not affected.
Configure file links at scale
When the IFC Viewer tab is added to a team, the SharePoint file or folder links inside the tab must still be configured. This can be done manually by the team owner, or automated via Microsoft Graph for large-scale rollouts.