Use ISO 19650
This guide explains the everyday workflow in ISO 19650, from opening a site to applying access changes safely.
Before you start
- ISO 19650 is installed on the site.
- You have SharePoint permission to manage access on the selected content.
- For licensed actions (such as edit/remove/import), your subscription is active.
1. Open ISO 19650
You can start ISO 19650 directly from a document library or add it to a SharePoint page for quick access.
Open it from a document library
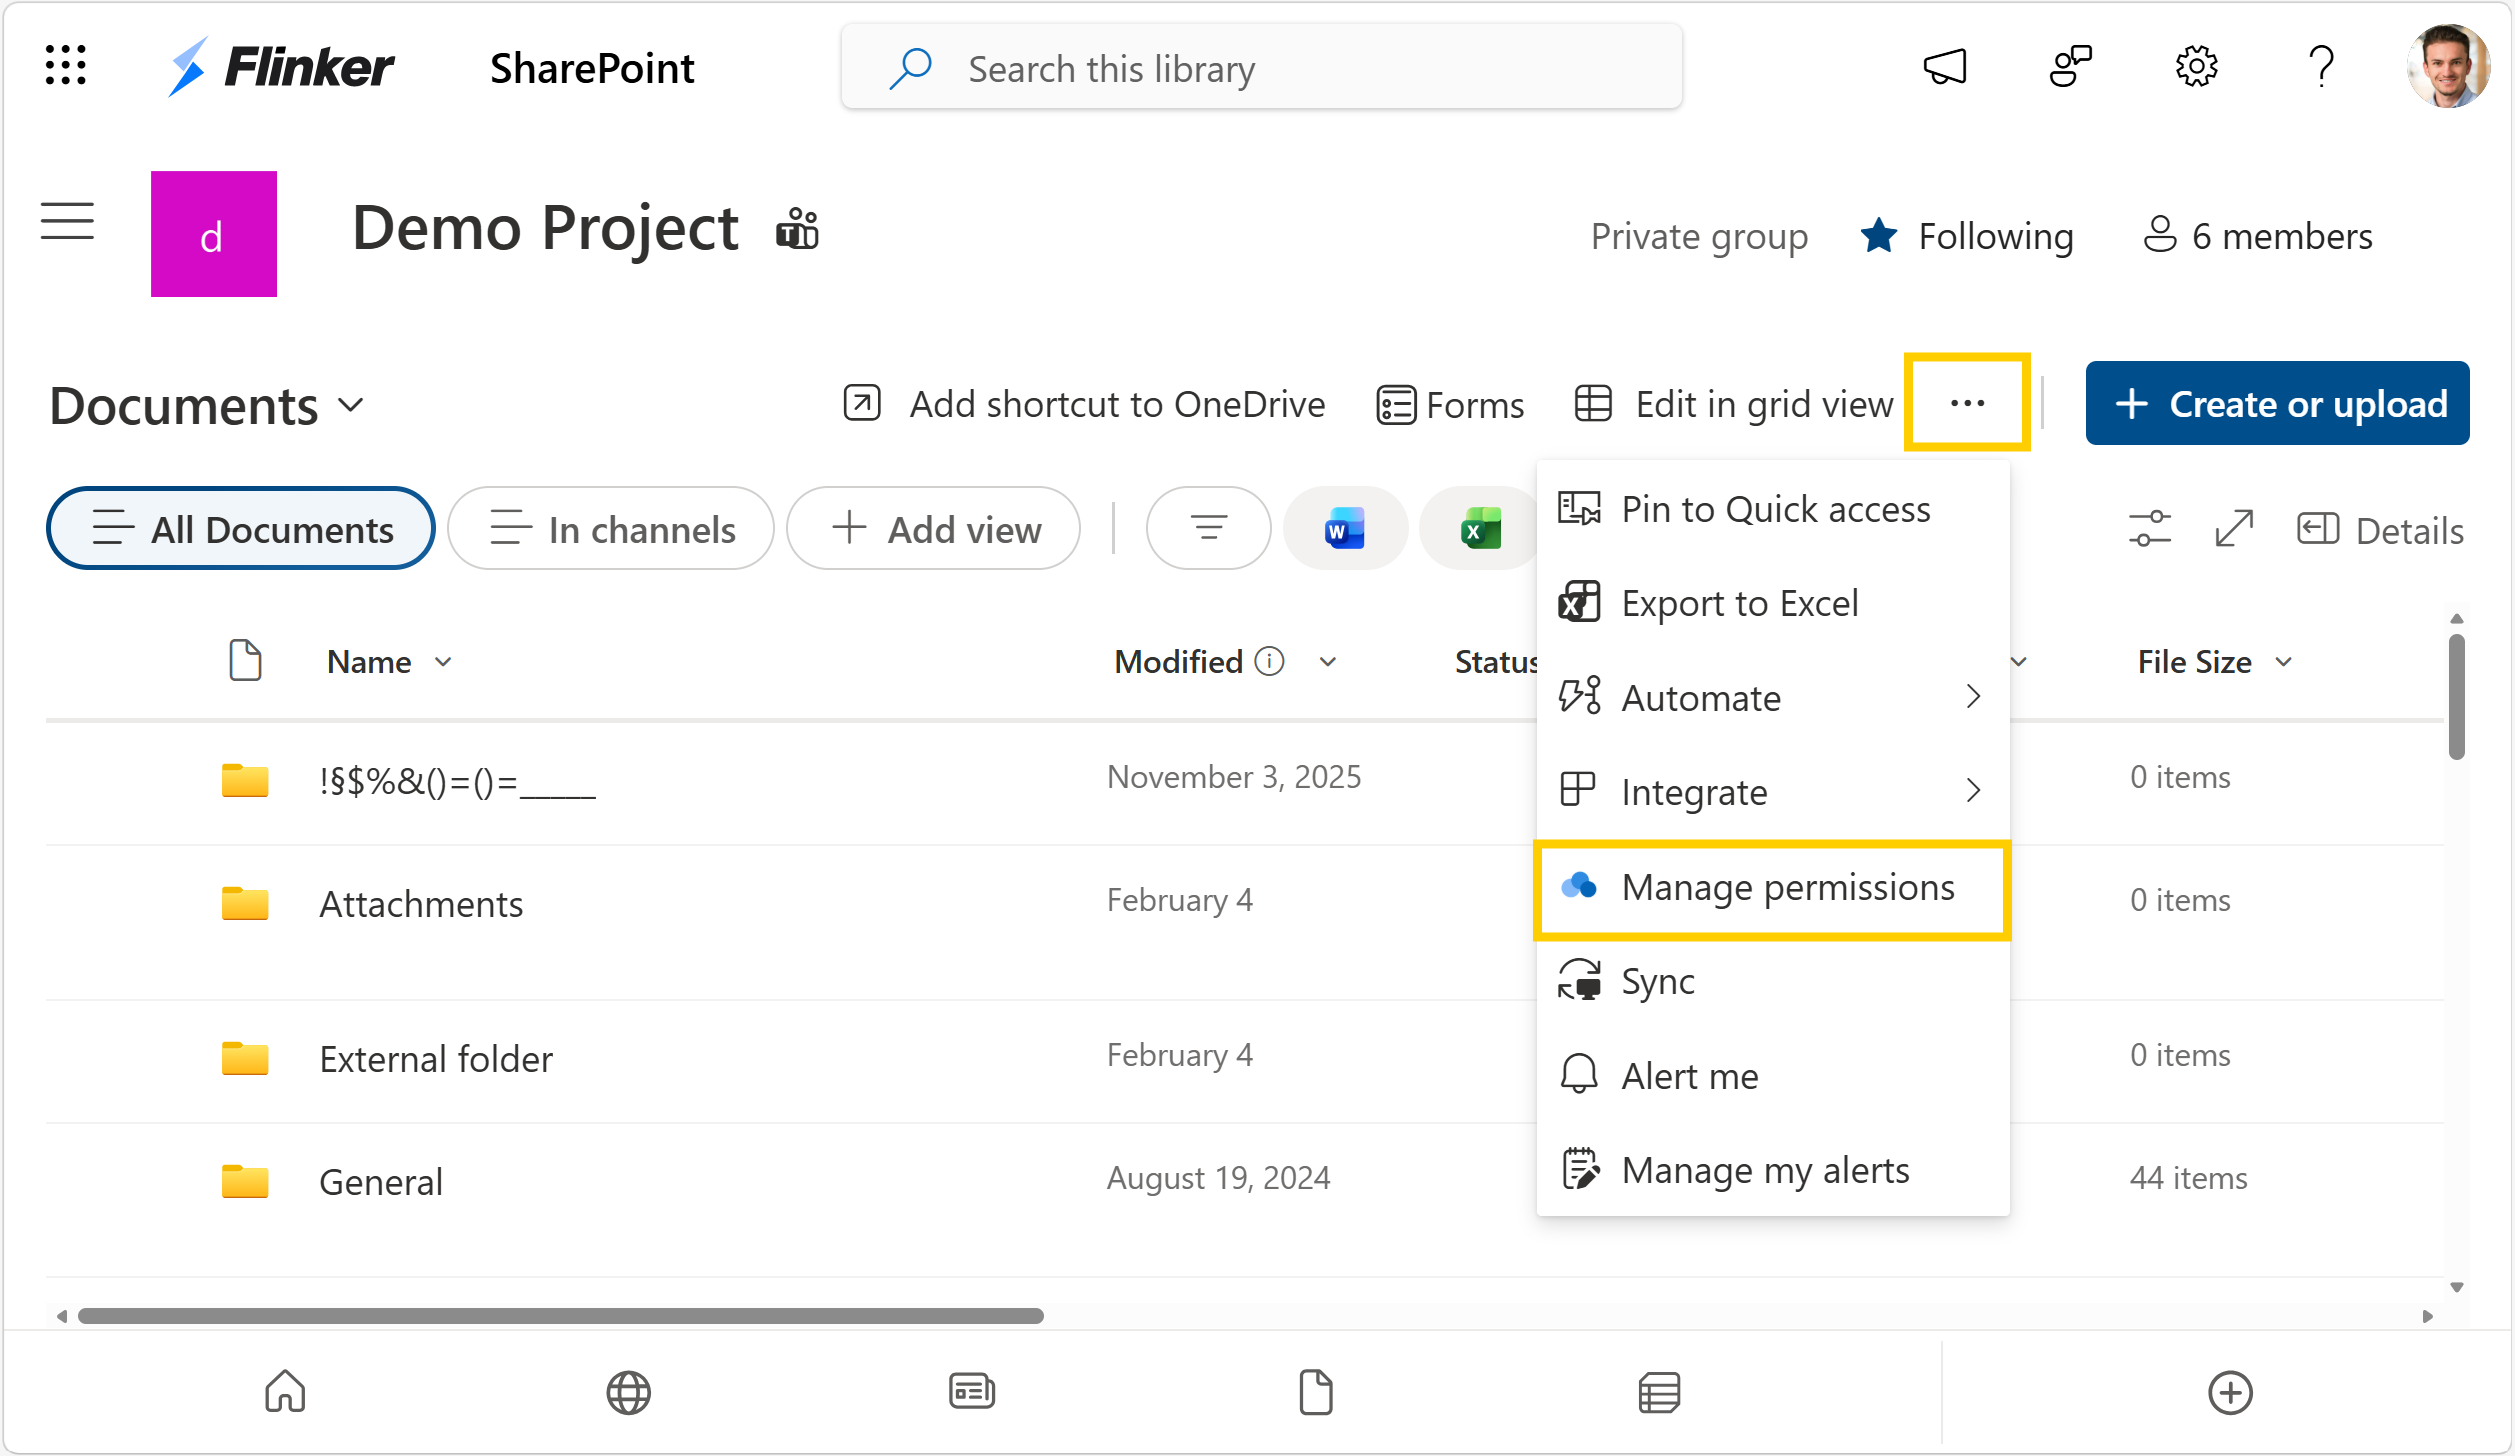
- Open the target document library or folder.
- Open the ... menu in the command bar.
- Select Manage permissions.
Add it as a SharePoint web part
If you want a permanent entry point on a site page:
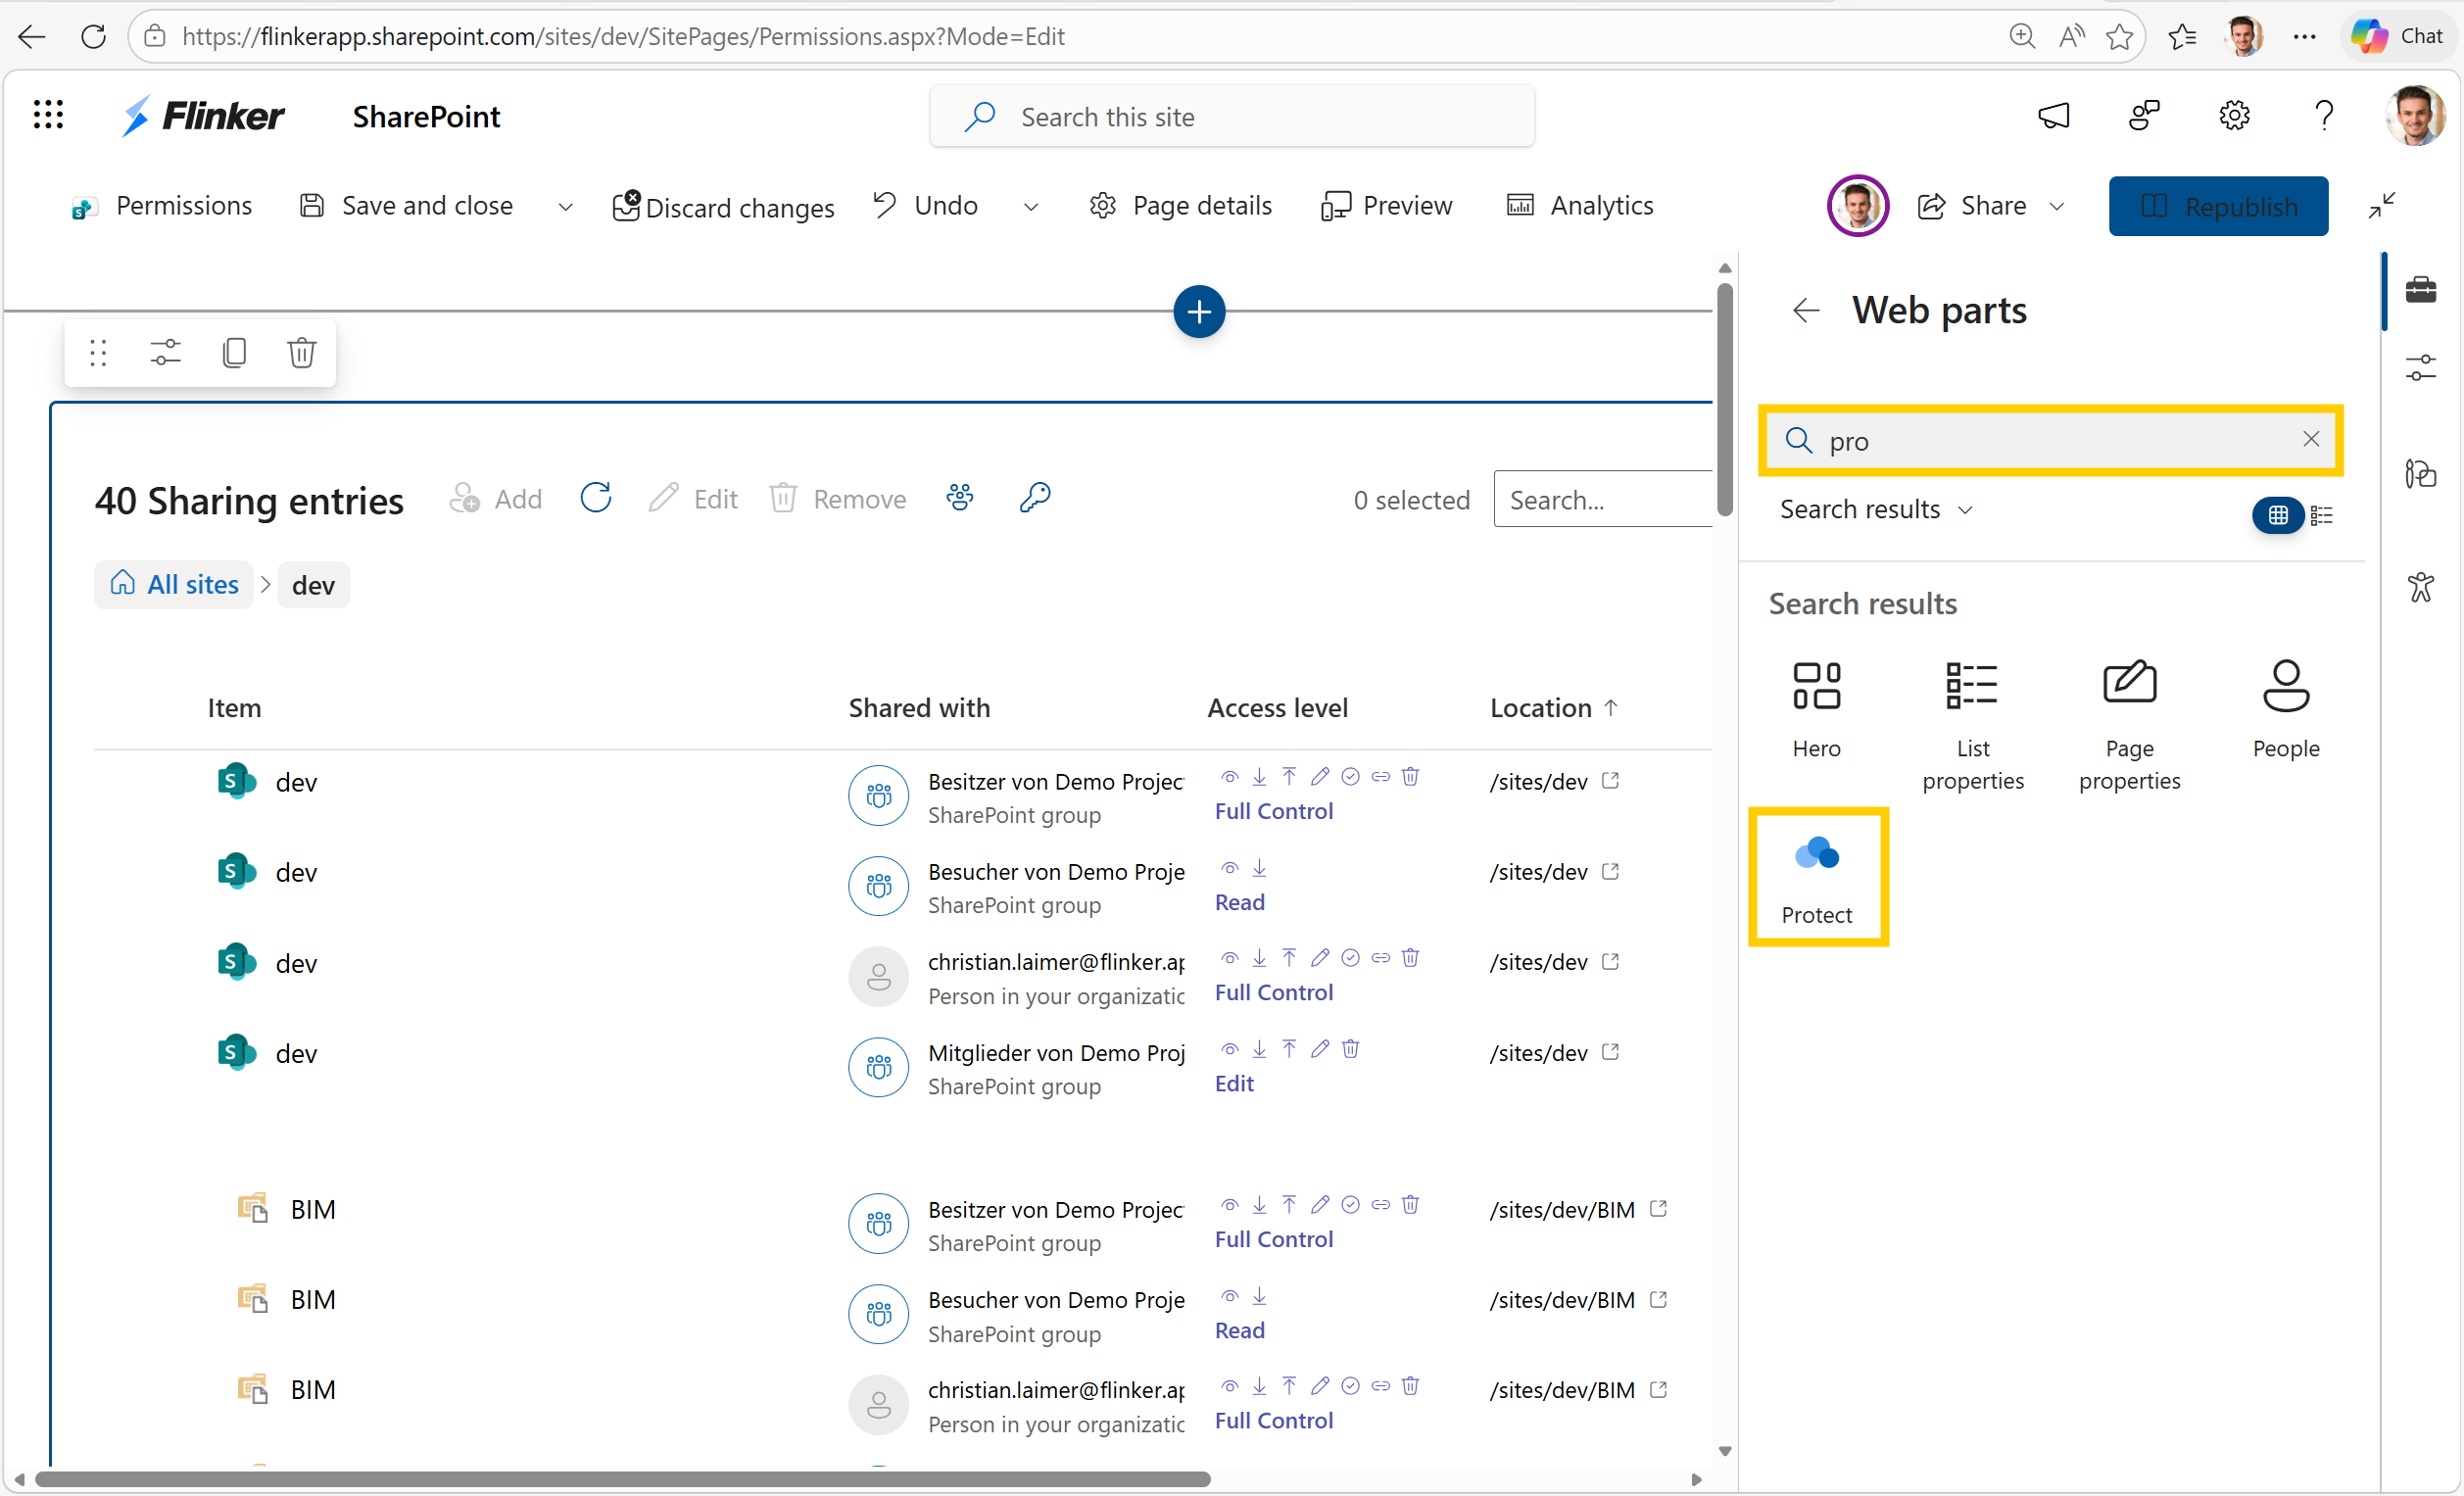
- Edit the SharePoint page where you want to use ISO 19650.
- Add a new web part.
- Search for
isoand select ISO 19650. - Save or republish the page.
2. Choose a view
ISO 19650 gives you two views:
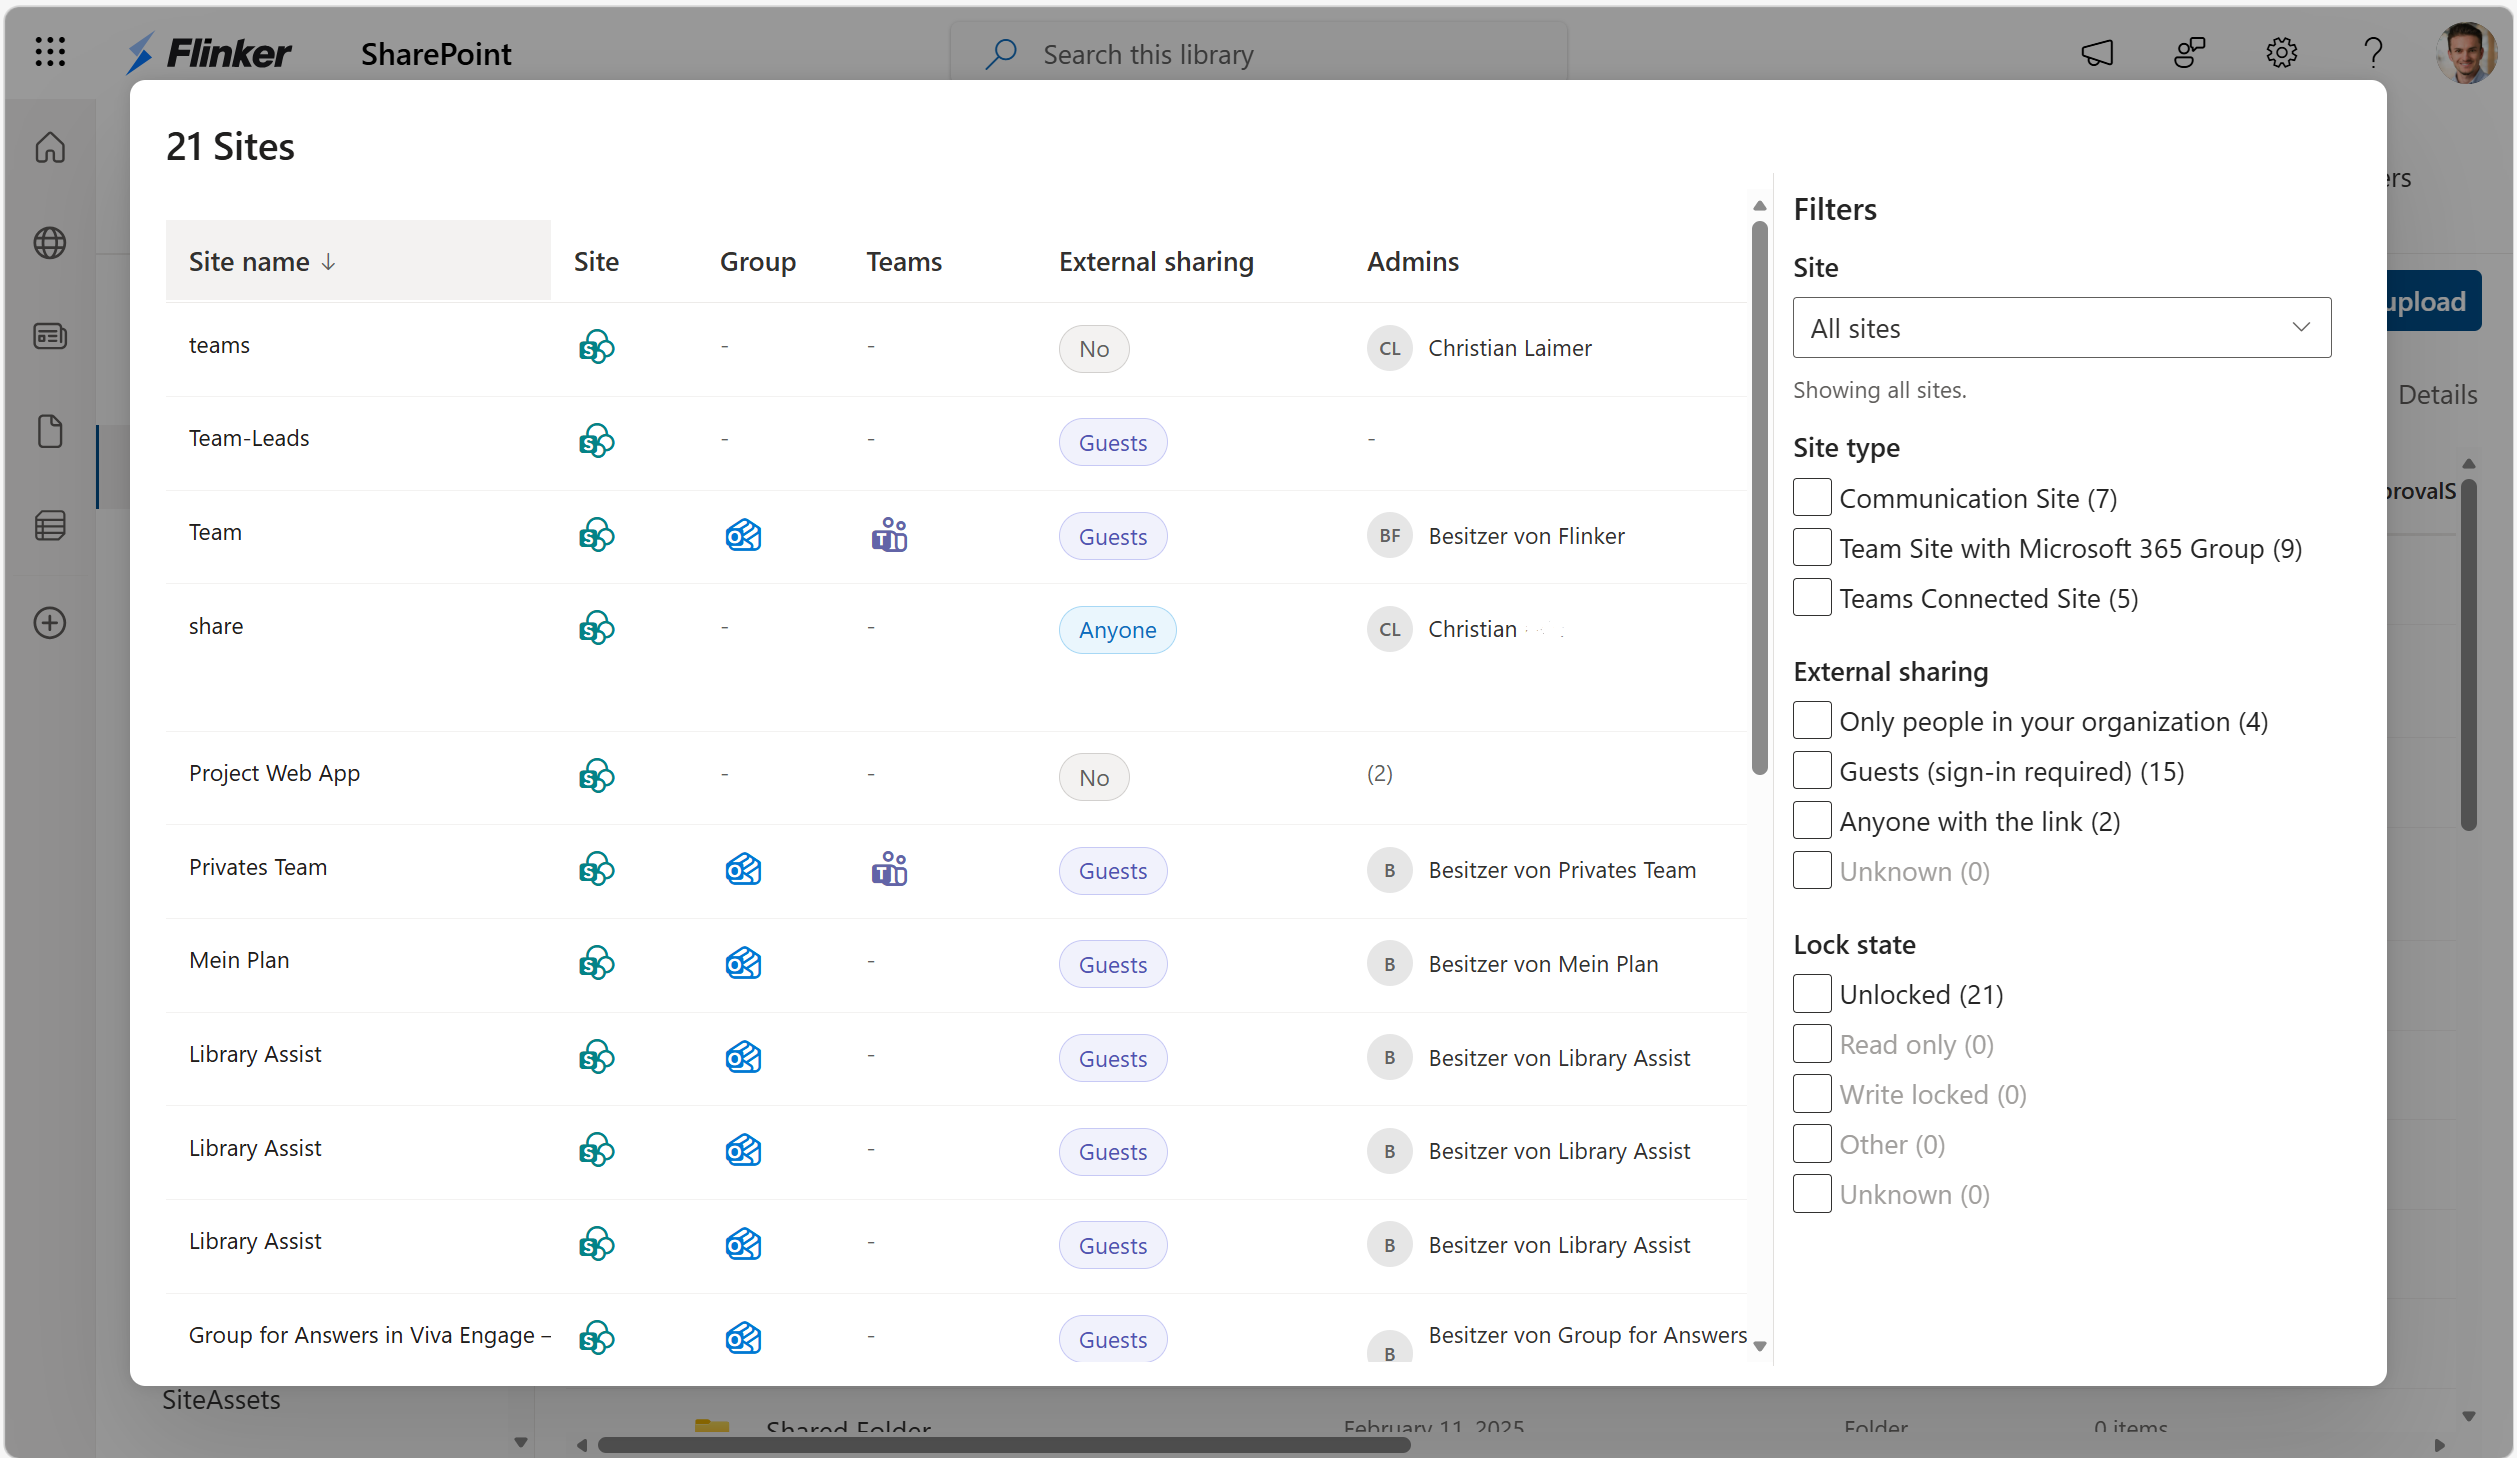
- Across sites view: View accessible SharePoint sites and filter by site type, external sharing mode, and lock state.
- Inside a site view: Work on one site or folder path with breadcrumb navigation and full permission details.
Use the All sites button in the breadcrumb to return to site-level overview at any time.

The All sites overview shows permissions across accessible SharePoint sites in one table, including site name, connected group or Teams status, external sharing mode, and site admins. The filter panel on the right helps narrow the list by site type, external sharing, and lock state.
3. Find entries fast
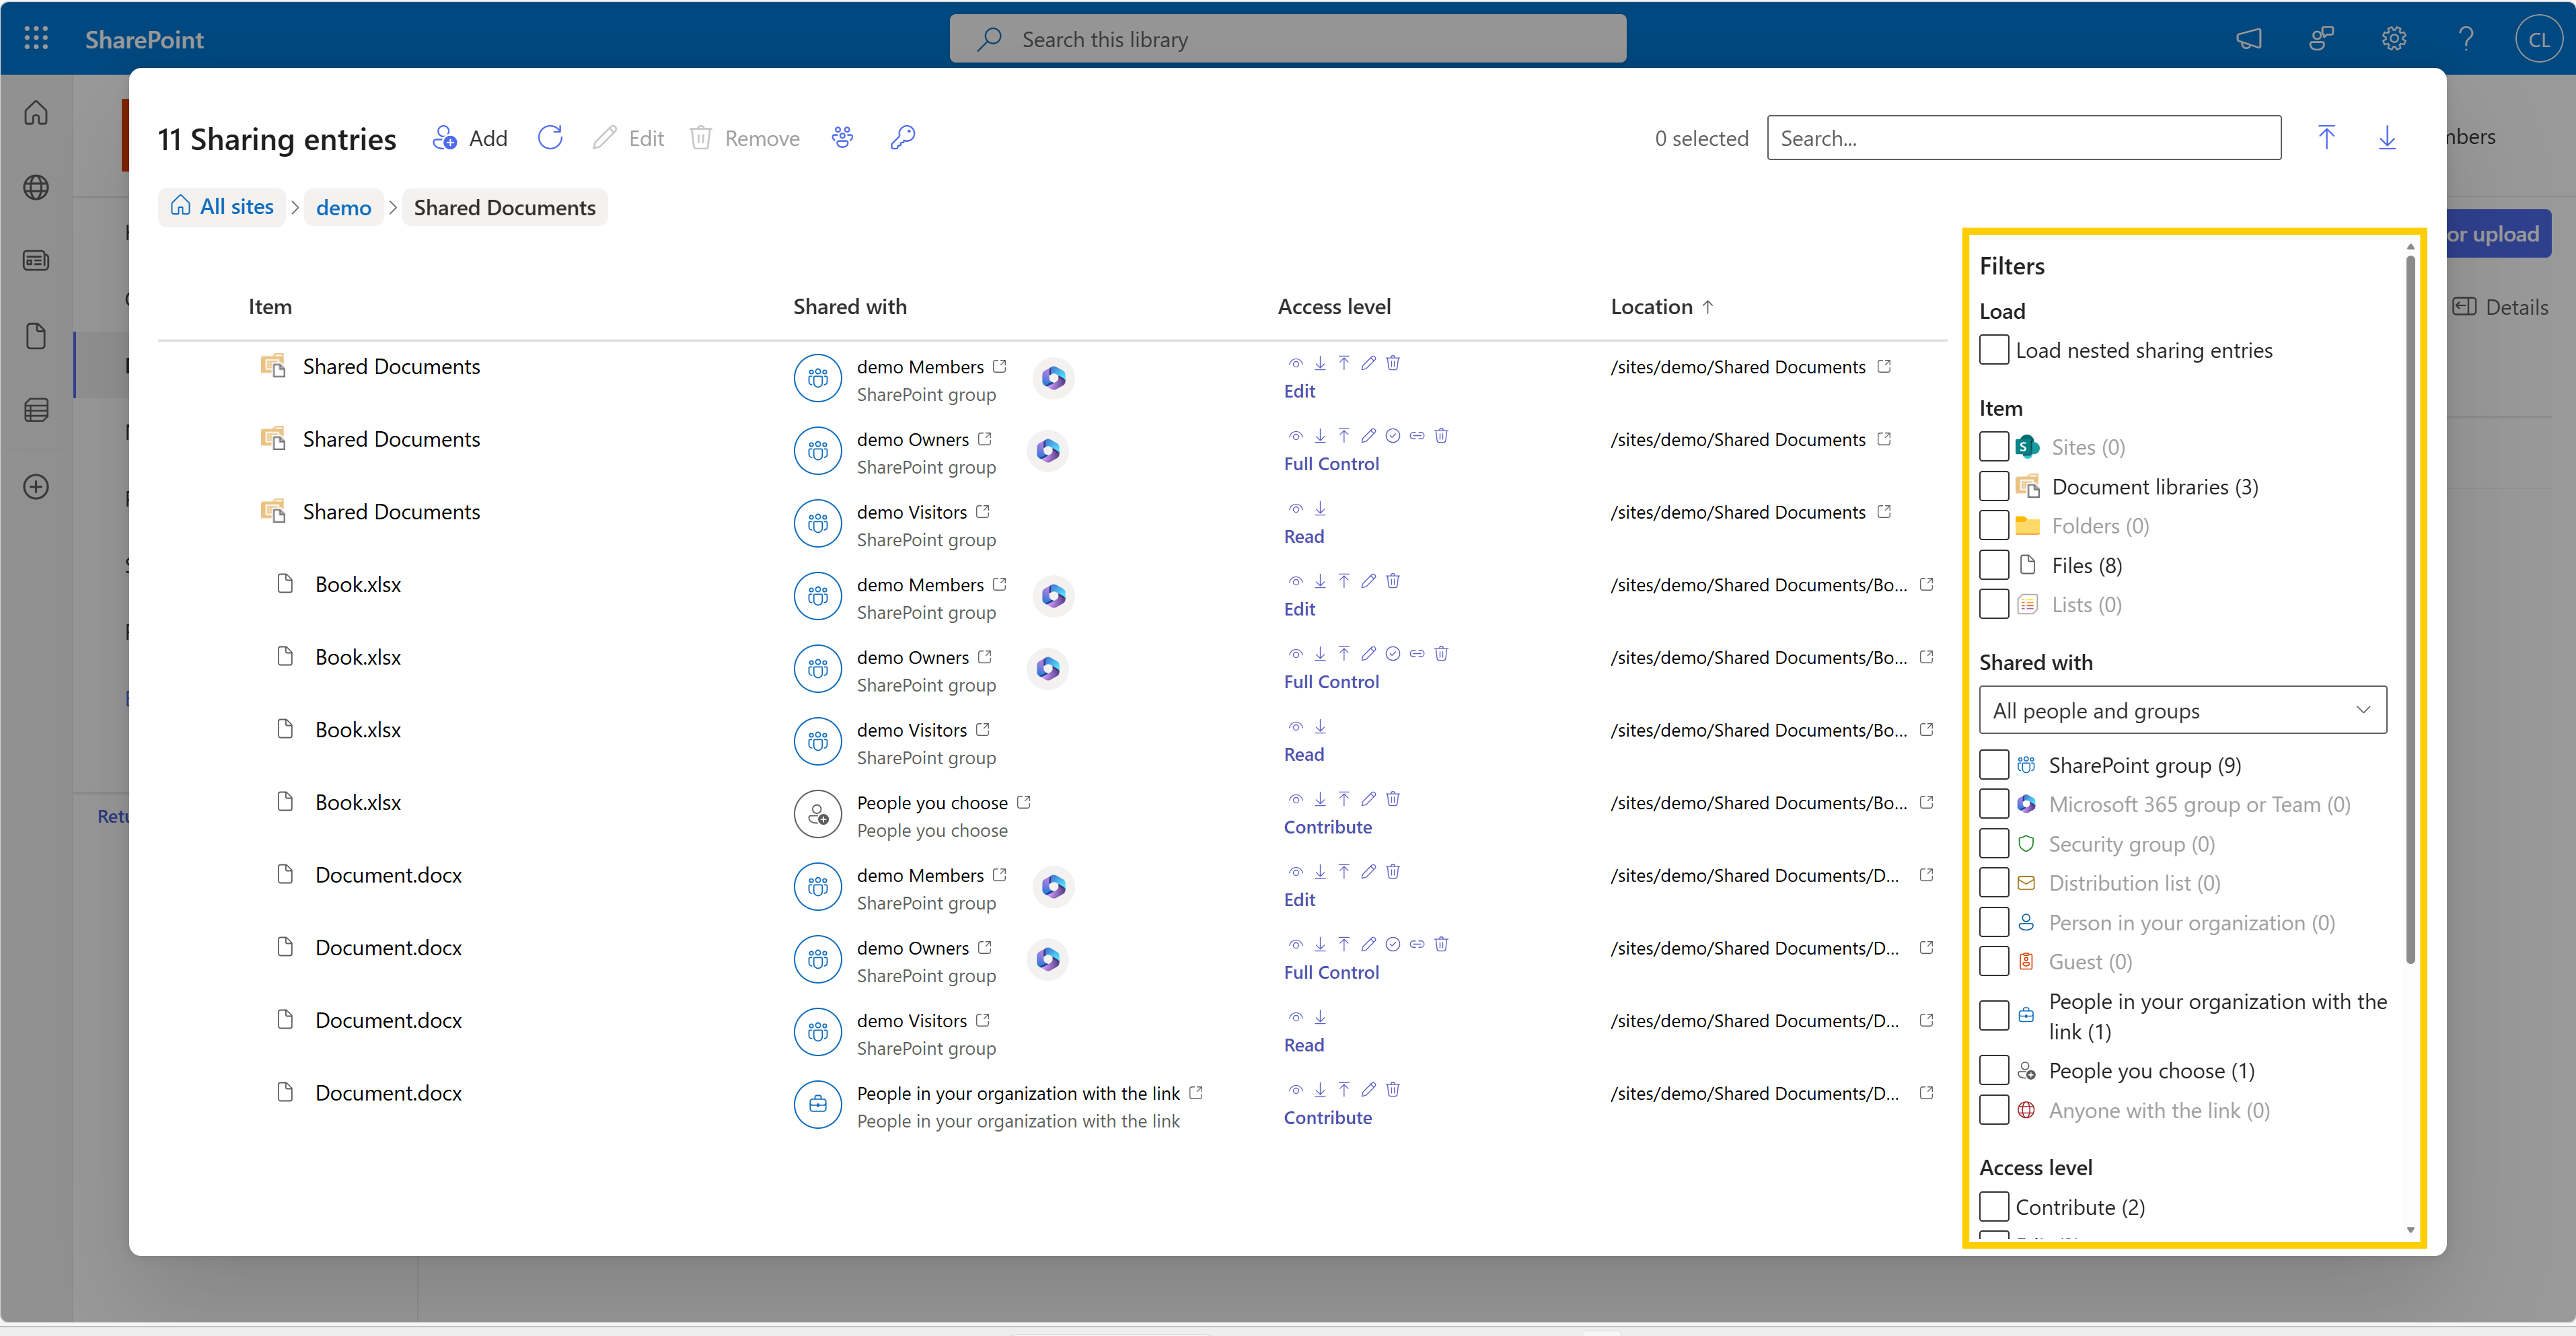
Use the search and filter panel to narrow results:
- Item type: site, library, folder, file, list
- Shared with: SharePoint groups, Microsoft 365 groups, internal users, guests, sharing links
- Access level
- Location path
- Access source: custom vs inherited
If needed, enable Load nested sharing entries to include deeper folder content.
4. Add access
- Navigate to the target folder or item.
- Select Add.
- Choose one person or group.
- Choose an access level.
- Optional: enable Notify people.
- Confirm to apply.

5. Change or remove existing access
- Select one or multiple entries in the table.
- Select Edit to change the access level in bulk, or Remove to revoke access.
- Confirm the action.
When all direct entries are removed from a scope, ISO 19650 can reset inheritance automatically to keep permissions consistent.
6. Import or export with Excel
- Export: Download current entries to Excel for audit or review.
- Import from Excel: Upload a permission template and validate paths, groups, and roles before applying changes.
Import remains blocked until validation issues are resolved.
7. Refresh and verify
- Use Refresh after changes to reload current access.
- Keep the tab open while large loads or save operations are running.
Troubleshooting
- You do not have access to this site: ask a site admin for permission.
- Site not found or unavailable: verify site URL or current context.
- Action blocked by subscription: activate or renew your ISO 19650 subscription.
- Long-running load: leave the tab open until progress completes.